
Start here
Log in to the portal →Or go to directlegal.legalconnect.com and log in. The NetDocuments option is on the Documents tab of an eFiling order. New to eFiling? See our eFiling guides for new and existing cases.
What you will need
- A NetDocuments account, and its email address and password
- Your documents saved in NetDocuments under the right client and matter
- An eFiling order started in the portal
Connect NetDocuments to your eFiling order
1 Choose NetDocuments on the Documents tab
Start an eFiling order and go to the Documents tab. Choose the document type under Select Document Type, then click Browse and choose NetDocuments.
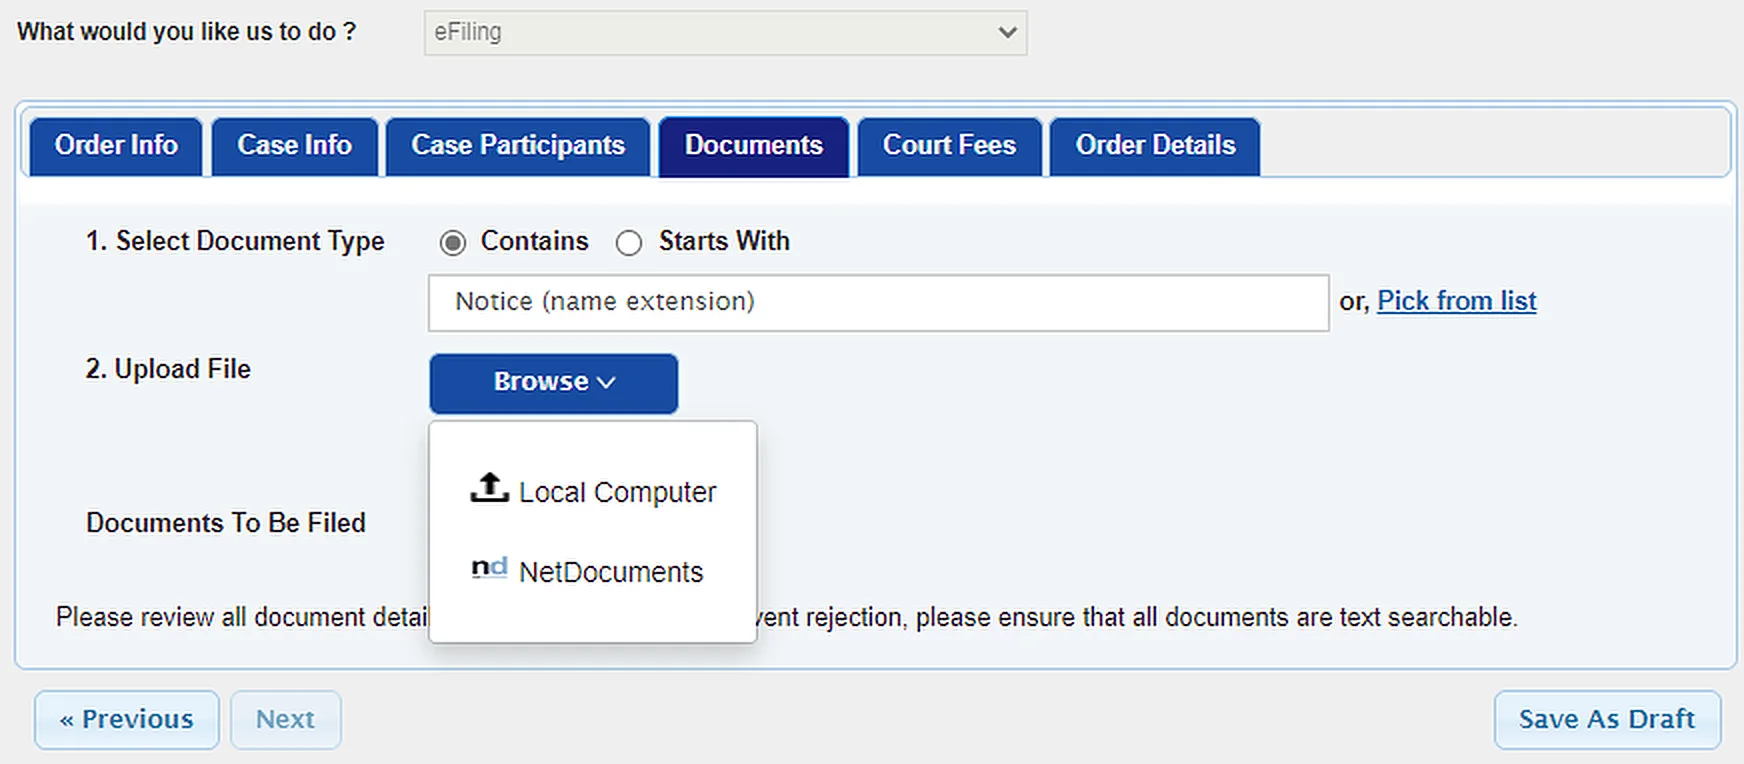
2 Sign in to NetDocuments
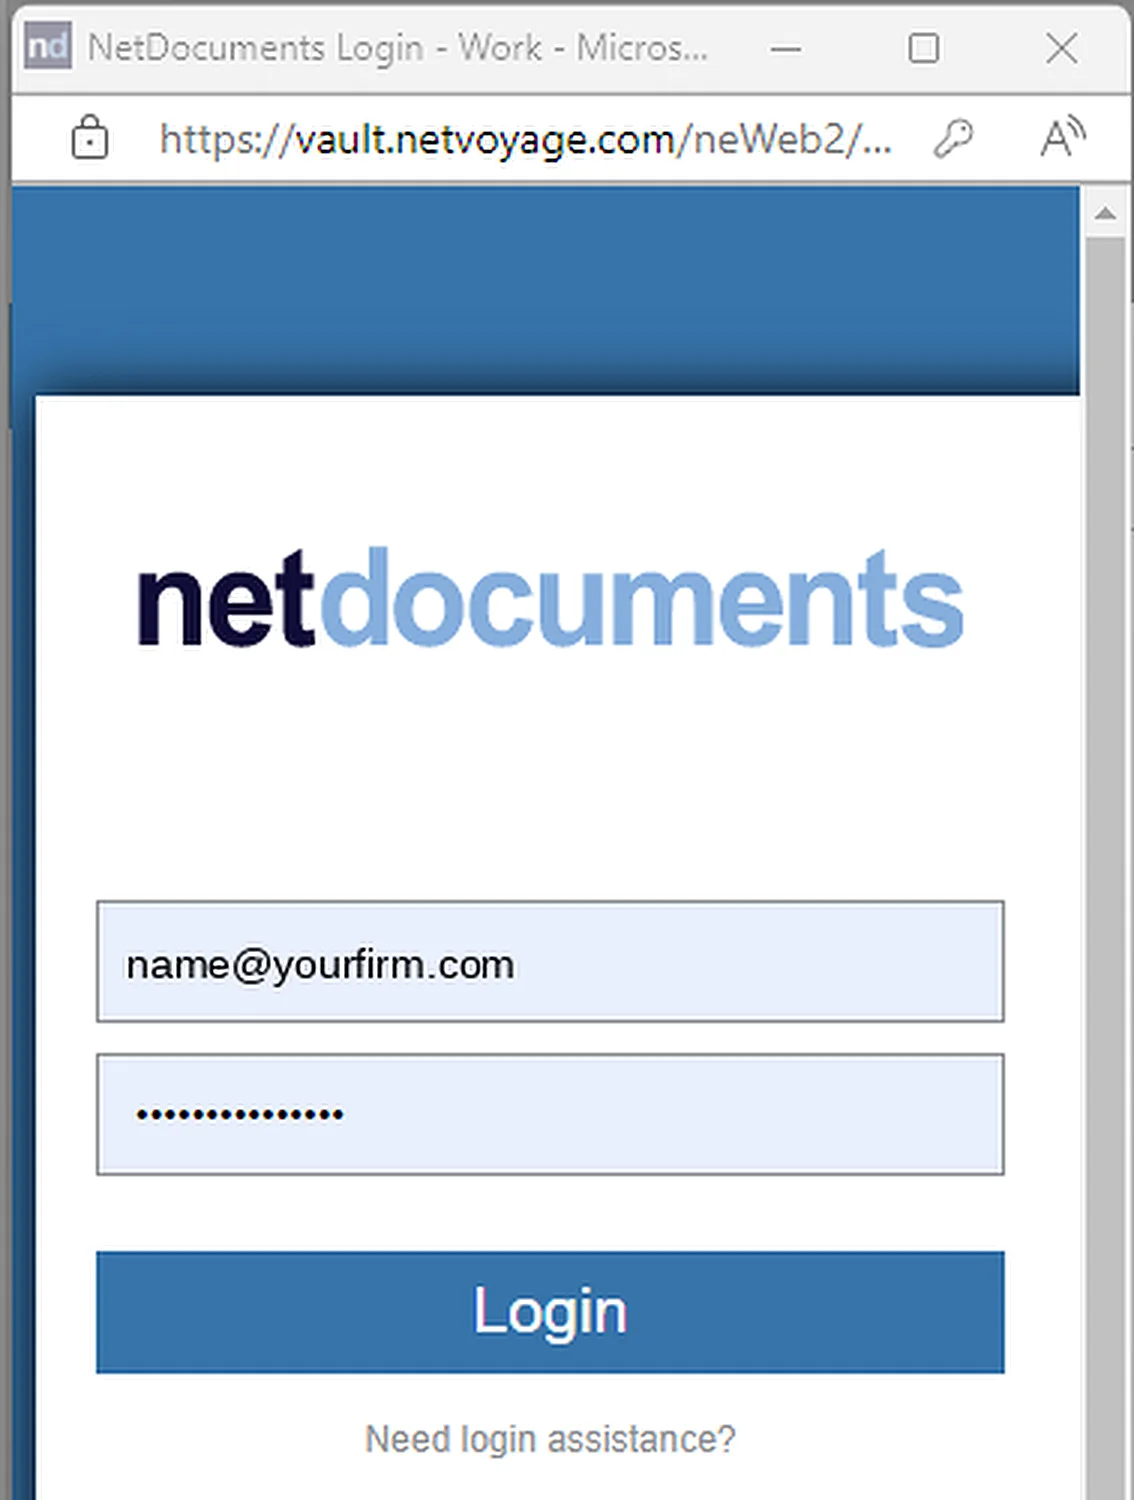
A NetDocuments window opens. Enter the email address and password for your NetDocuments account and click Login.
3 Allow the connection
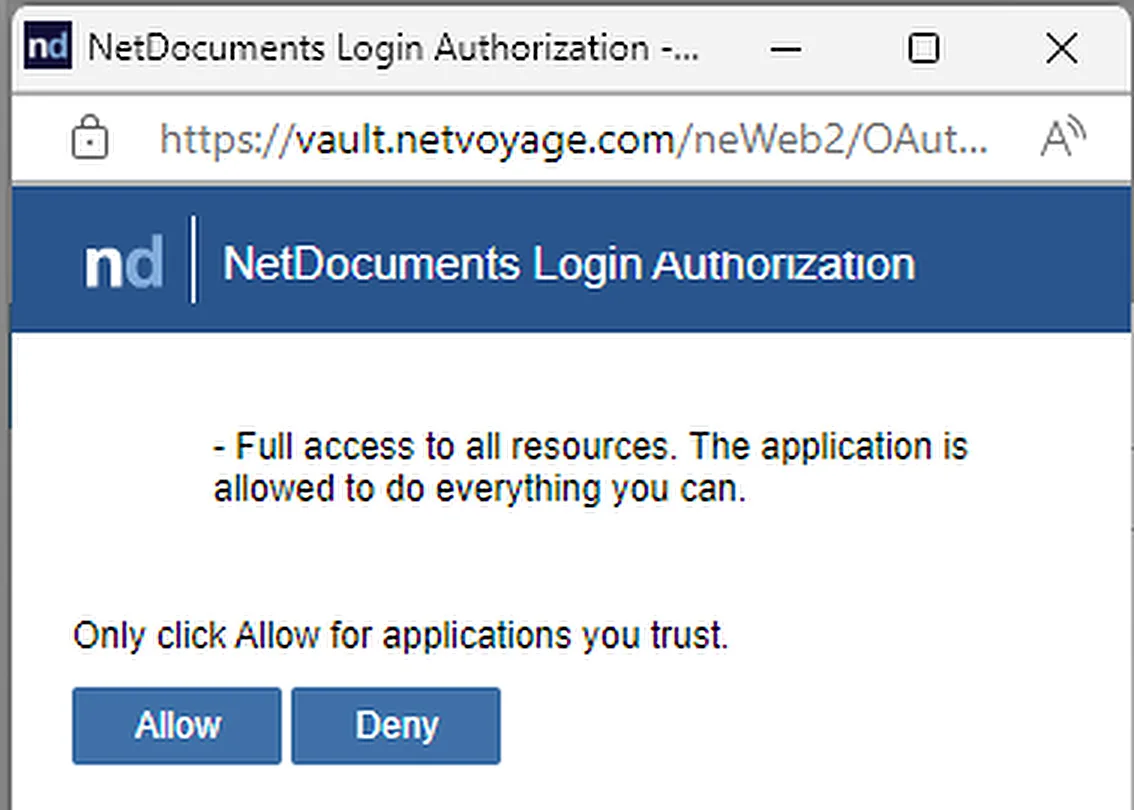
NetDocuments asks you to allow the connection to your NetDocuments account. Click Allow.
The window closes and you return to your order, where the NetDocuments file window opens.
Add documents from NetDocuments
4 Choose your document
Use the lists at the top of the NetDocuments window to choose the Cabinet, Client and Matter. The matter’s folders and files appear below. Open the folders, select your file and click Upload File.
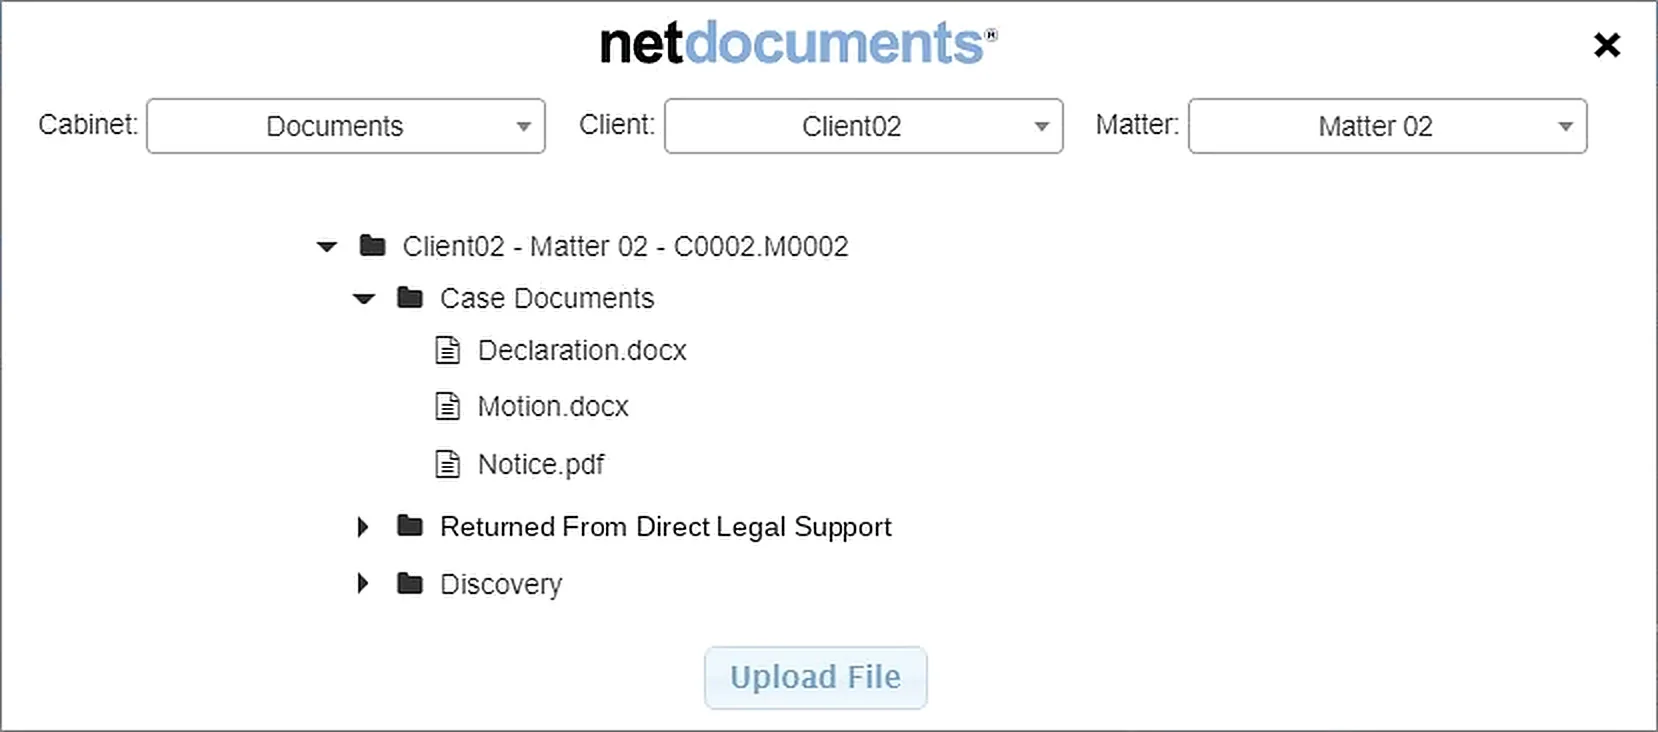
5 Check the document in your order
The document is pulled from NetDocuments into your order and appears under Documents To Be Filed. Fill in the details below it. Fields marked with an asterisk (*) are required, and the document shows COMPLETE when they are filled in.
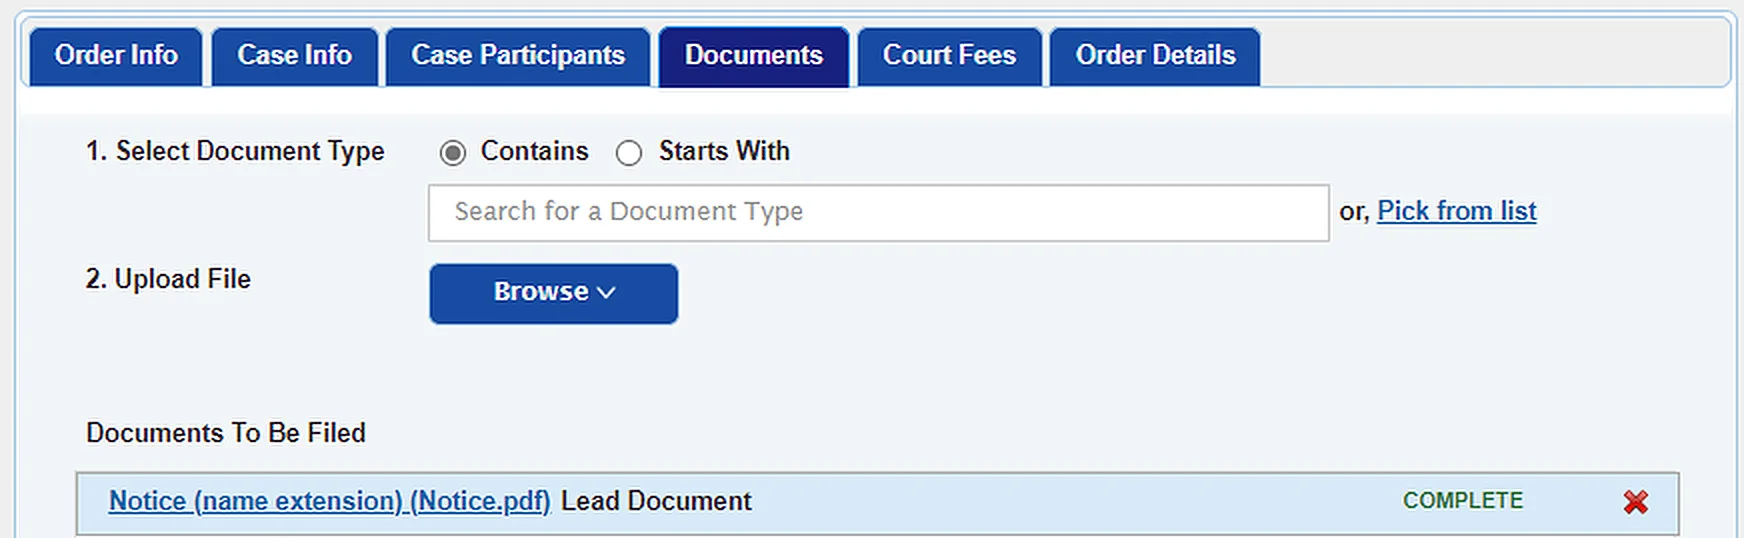
To add more documents, repeat these steps for each one. Then your eFiling order continues as usual.
Find the court’s returned documents in NetDocuments
When the court clerk processes your eFiling, you get an email saying whether it was Accepted, Rejected or Partially Accepted, with links to the documents. The documents are also on the order’s Deliverables tab, and they are saved in NetDocuments automatically, under the client and matter you chose.
6 Open the matter in NetDocuments
In NetDocuments, open the client and matter you chose for the order. On the Documents tab, open the folder named Returned From followed by our company name, Direct Legal Support.
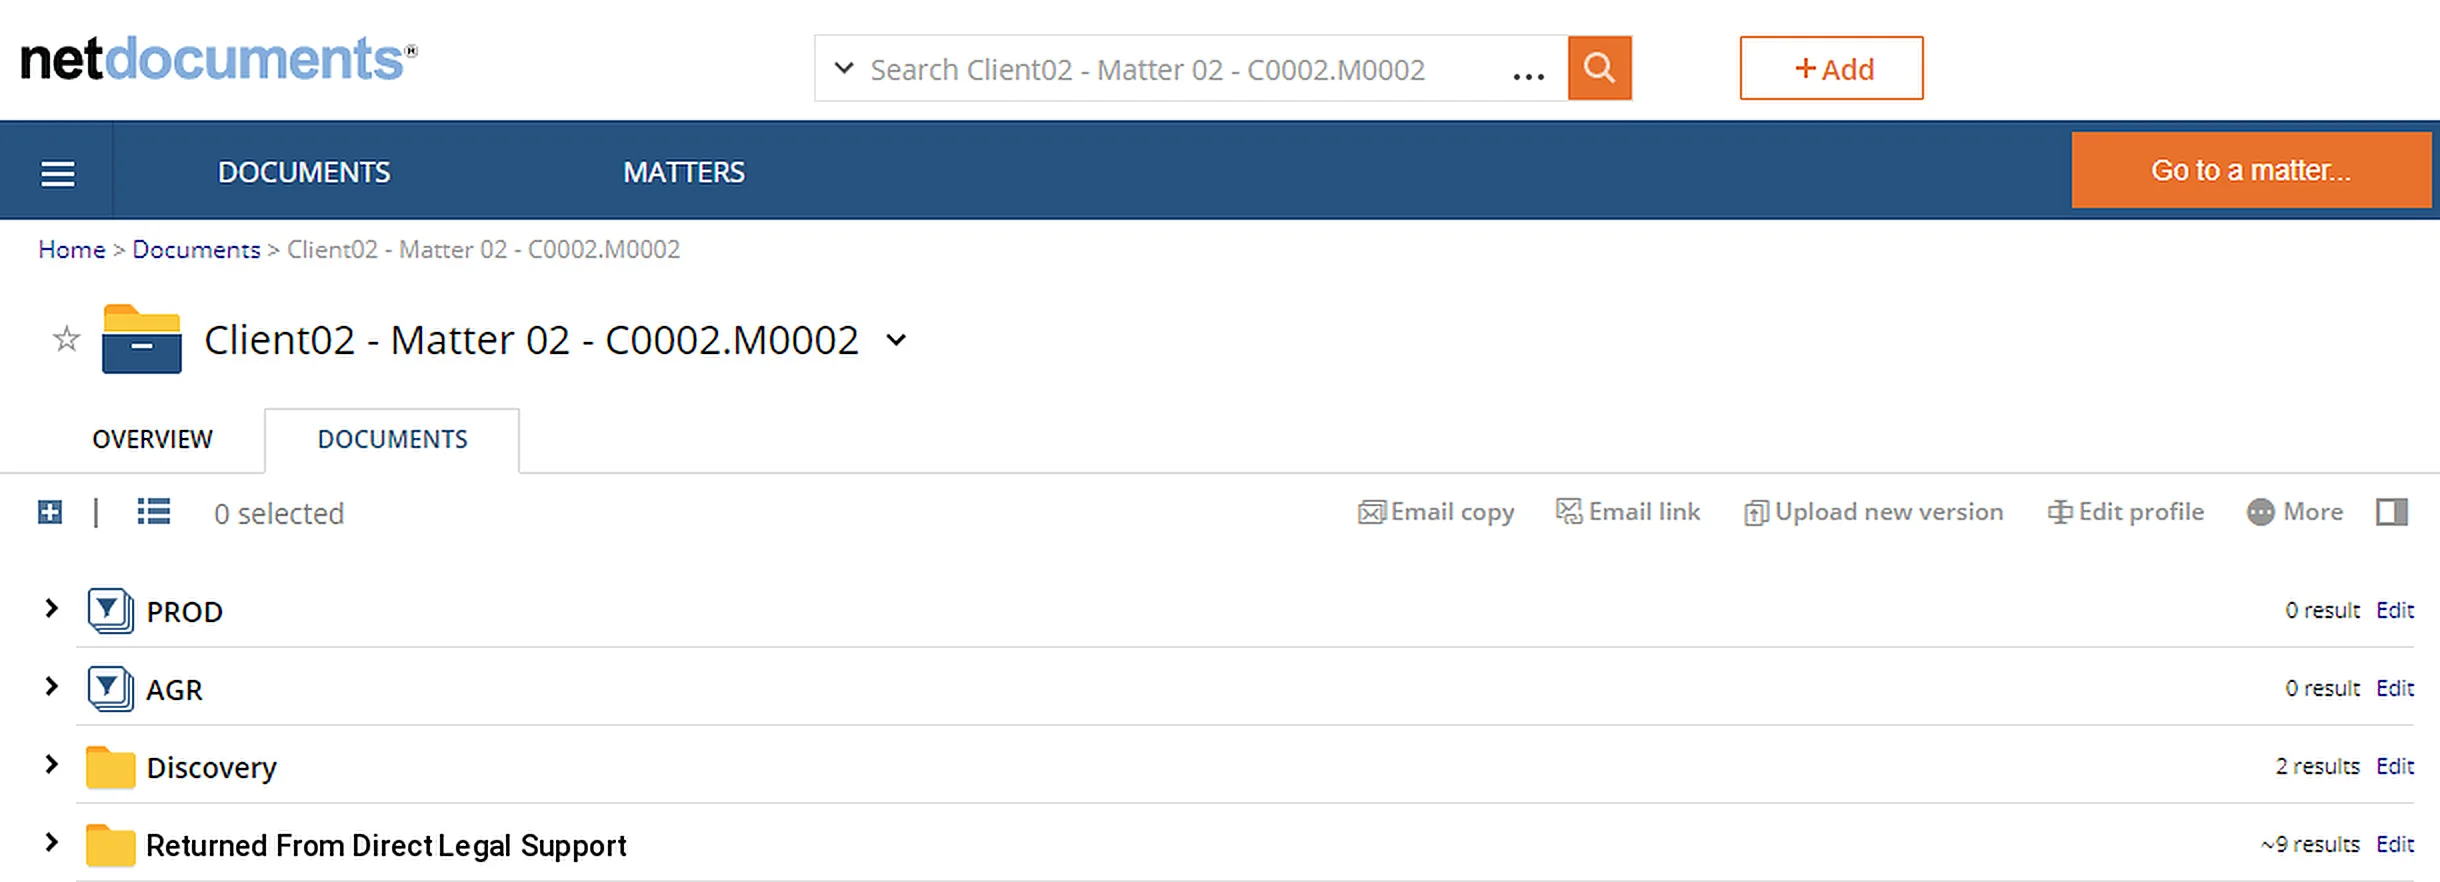
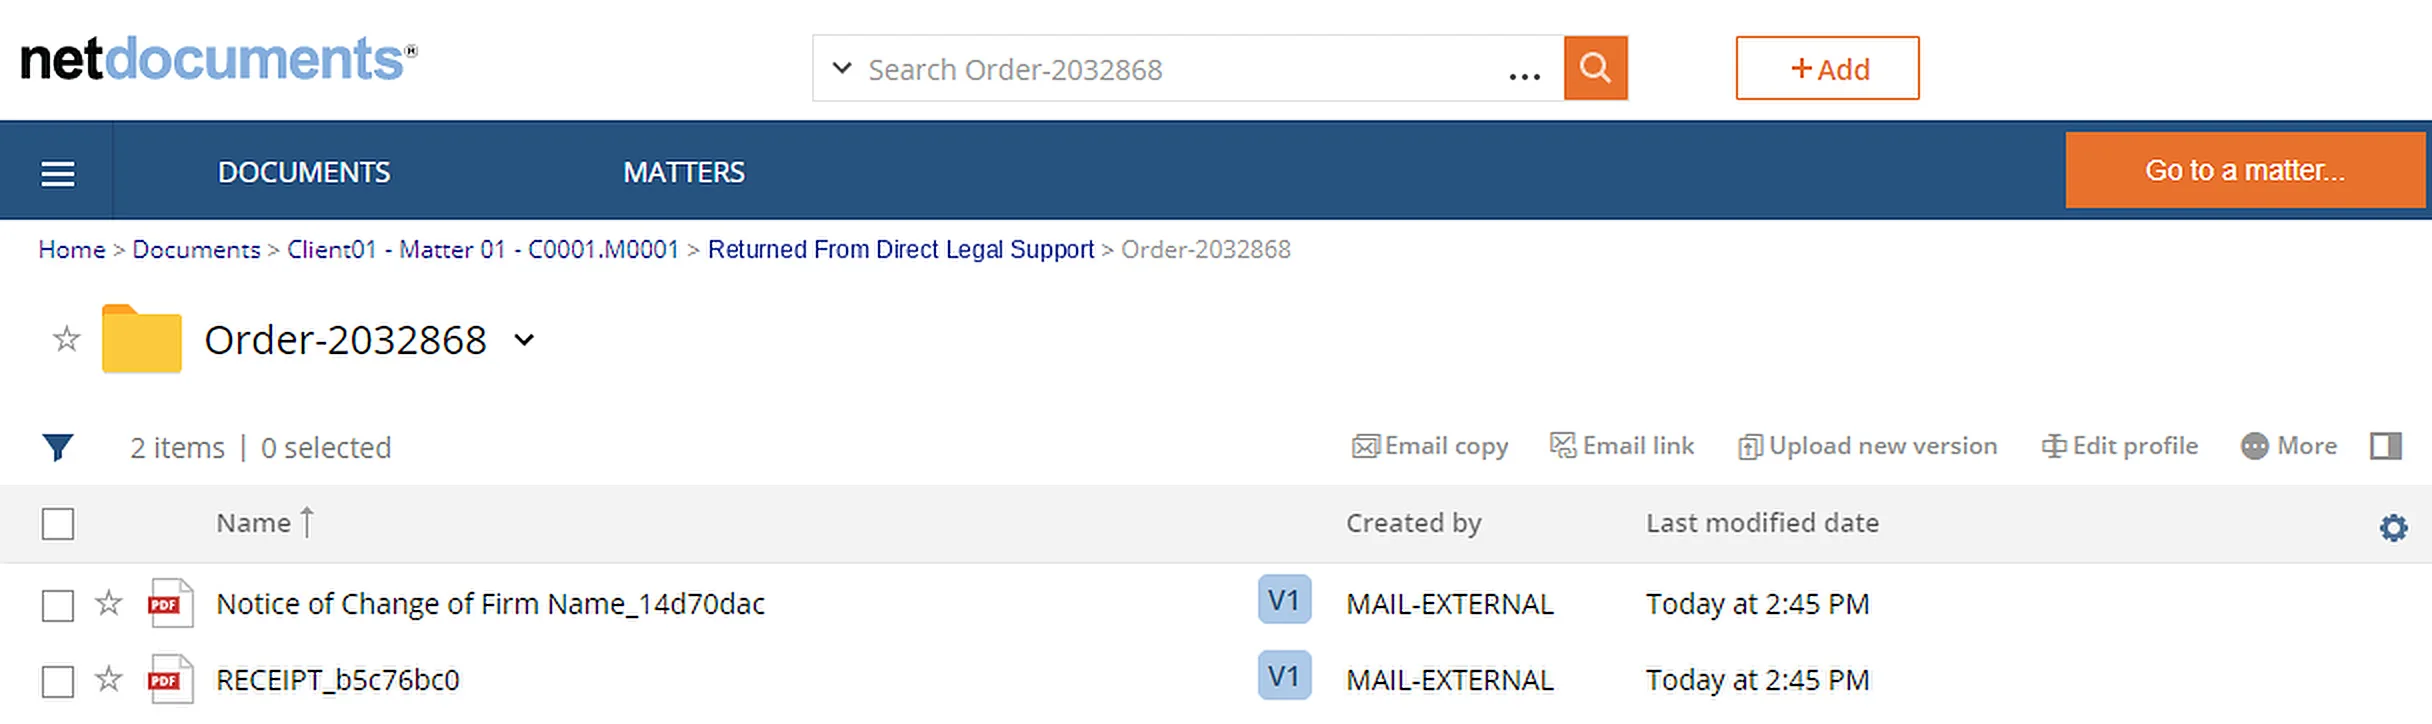
7 Open the folder for your order
The Returned From folder holds one folder for each eFiling order sent under this client and matter. Each one is named Order- followed by the order number. Open the one that matches the order number you got when you placed the order. Inside are the documents returned from the court, such as conformed copies, receipts and notices.
Staying connected
How long NetDocuments stays connected to the portal depends mostly on NetDocuments. If you place another eFiling order soon after the first, you probably won’t need to sign in again. After a longer break, NetDocuments may ask you to sign in and allow the connection again. If your browser saves your NetDocuments login, it fills in for you.
Good to know
NetDocuments works with eFiling orders. The NetDocuments option appears when you upload documents to an eFiling order, and only customers with a NetDocuments account can connect.
File types. You can upload the same kinds of files from NetDocuments as from your computer, such as PDF, Word and Rich Text files. Files that aren’t PDFs are converted to PDF before they go to the court.
Use Clio? See our guide, Using Clio with Direct Legal Support.
Questions? We’re here to help.
Call our Litigation Division Monday to Friday, 8:30 a.m. to 5:00 p.m. Pacific, or email info@directlegal.com. Ready to order? Log in to the portal.
Prefer paper? Download this guide as a PDF to print or save. More guides: Client Portal Guides.