
Start here
Log in to the portal →Or go to directlegal.legalconnect.com and log in with your email address and password. Use a current version of Chrome, Edge, Firefox or Safari. New to the portal? See our Creating a New Account guide.
What you will need
- The name of the person or business to be served
- The address where they should be served
- The case number and court, if you have them
- Your documents, as one file or one file per document
- Your billing code, if your firm uses one
1 Click Place an Order
Log in to your account. On your dashboard, click Place an Order.

2 Choose Process Serving
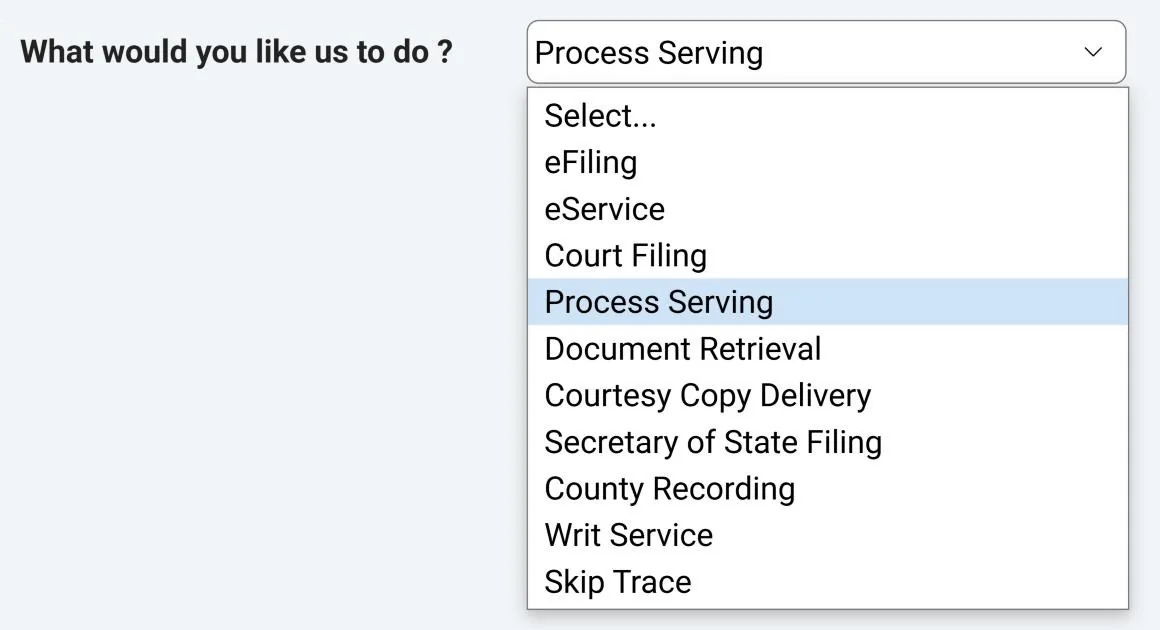
In What would you like us to do?, select Process Serving.
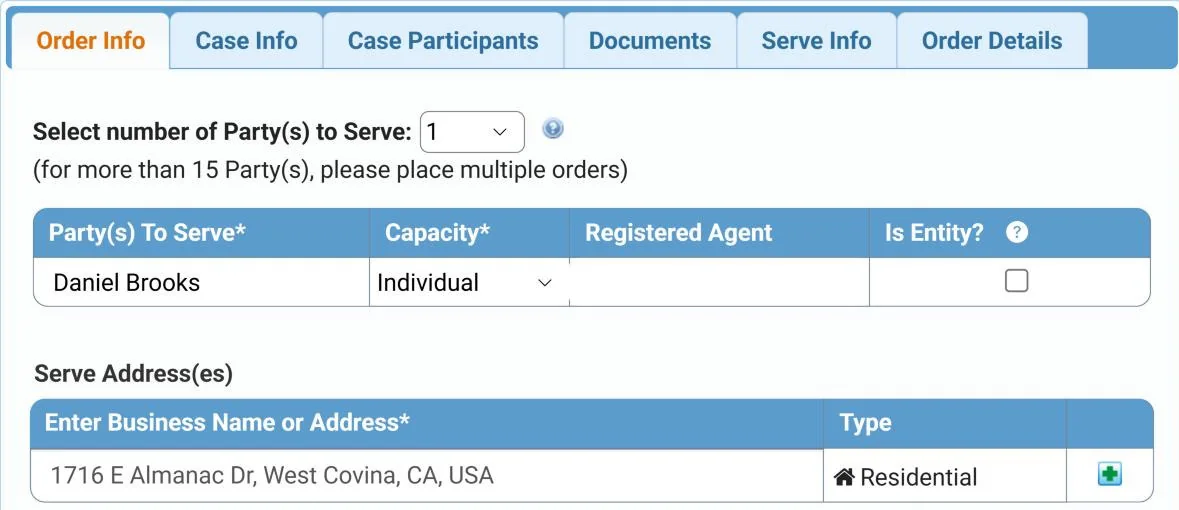
3 Enter the party to be served
Leave Select number of Party(s) to Serve set to 1. Under Party(s) To Serve, type the name of the person or business to be served. Choose their Capacity, such as Individual or Corporation, and enter the Registered Agent if you know it. If you are serving a business or other entity, check Is Entity?
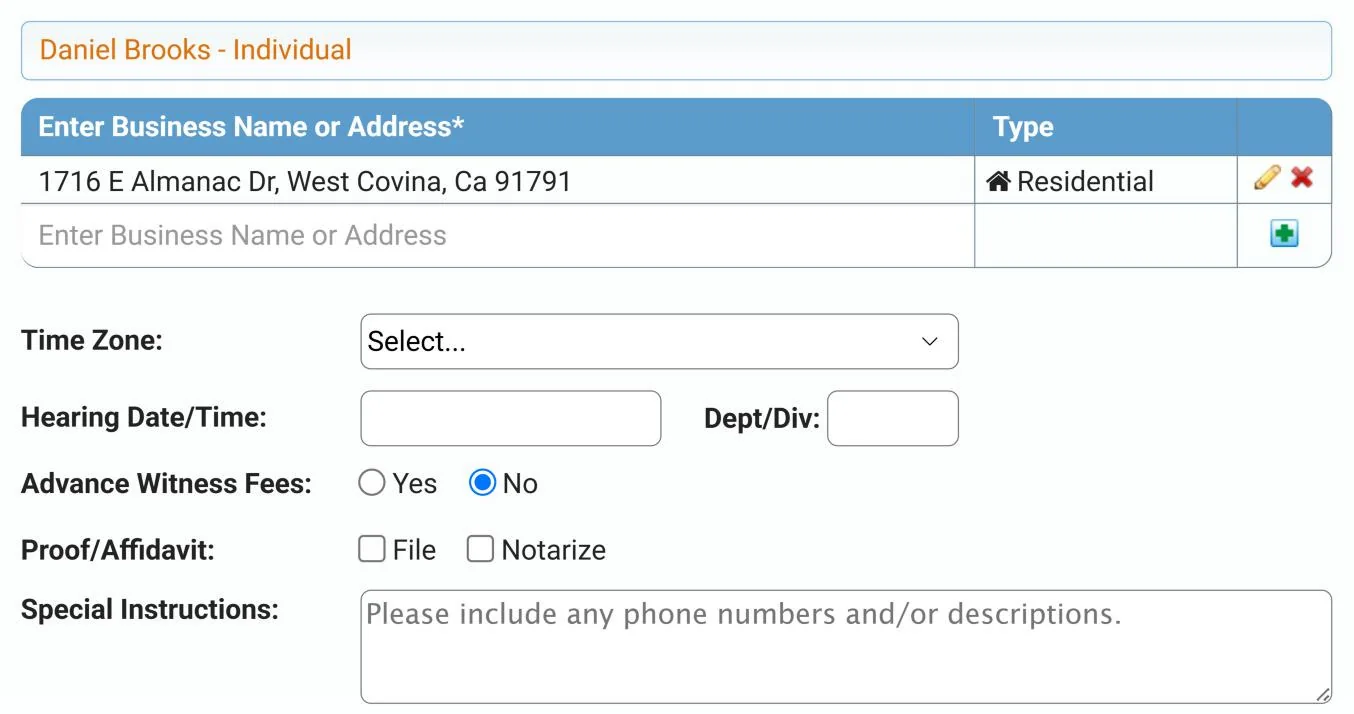
In Enter Business Name or Address, start typing the address where the documents should be served and choose it from the list. The address Type, such as Residential or Business, is filled in for you.
4 Add the hearing details and service options
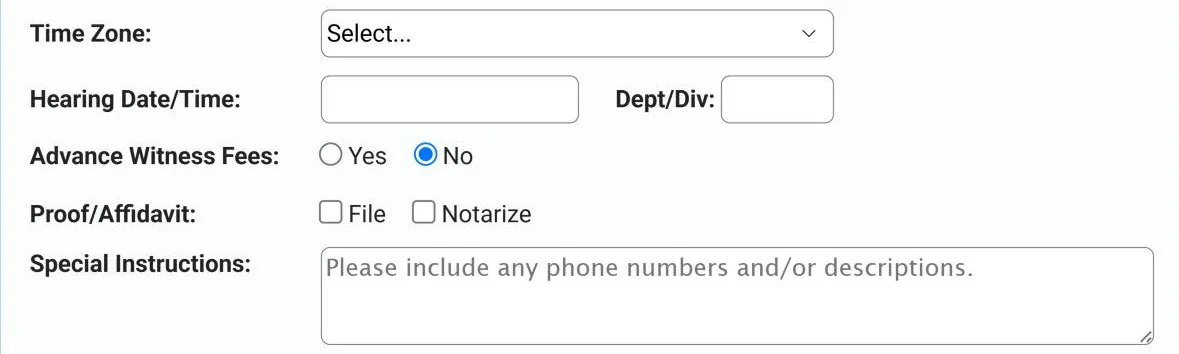
If the documents have a hearing, enter the Hearing Date/Time and Dept/Div, and choose the Time Zone.
- To have us advance witness fees, choose Yes next to Advance Witness Fees.
- To have us file the proof of service or have it notarized, check File or Notarize next to Proof. Additional fees apply.
- In Special Instructions, tell us anything that will help us serve the party, such as phone numbers or a description of the person.
Click Next.
5 Enter the case information
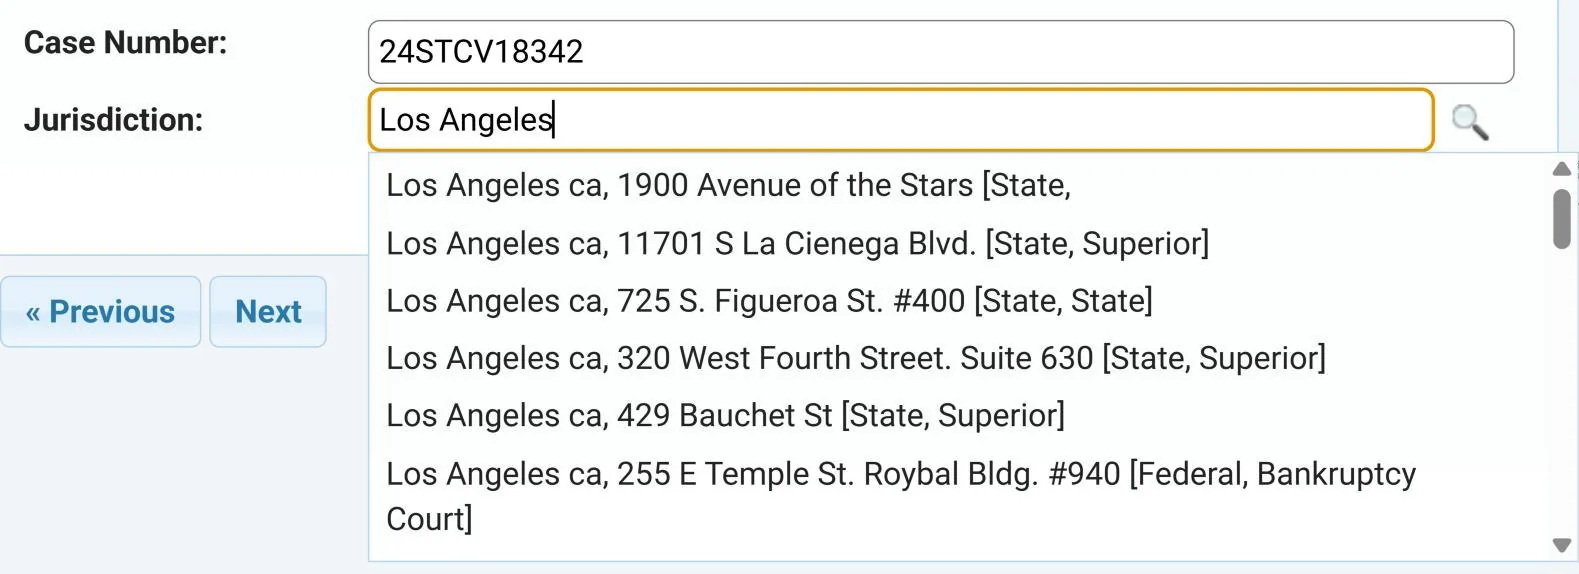
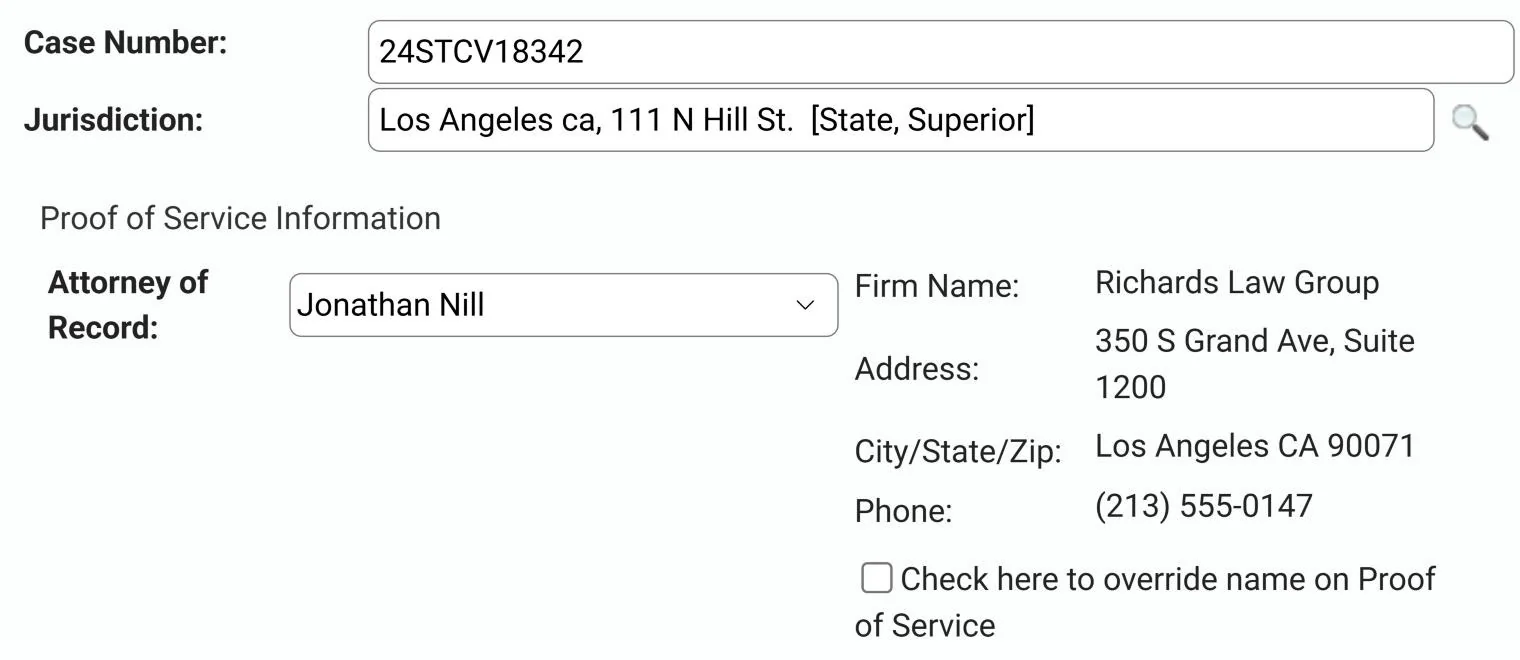
On the Case Info tab, type the Case Number. If the case is already in your account, choose it from the list and the court and case title fill in for you. For a case that is new to your account, press Enter. Then, in Jurisdiction, type the city where the court is located and choose the court from the list.
Then choose the Attorney of Record. The firm details for that attorney appear next to the name. Click Next.
5A No case number yet?
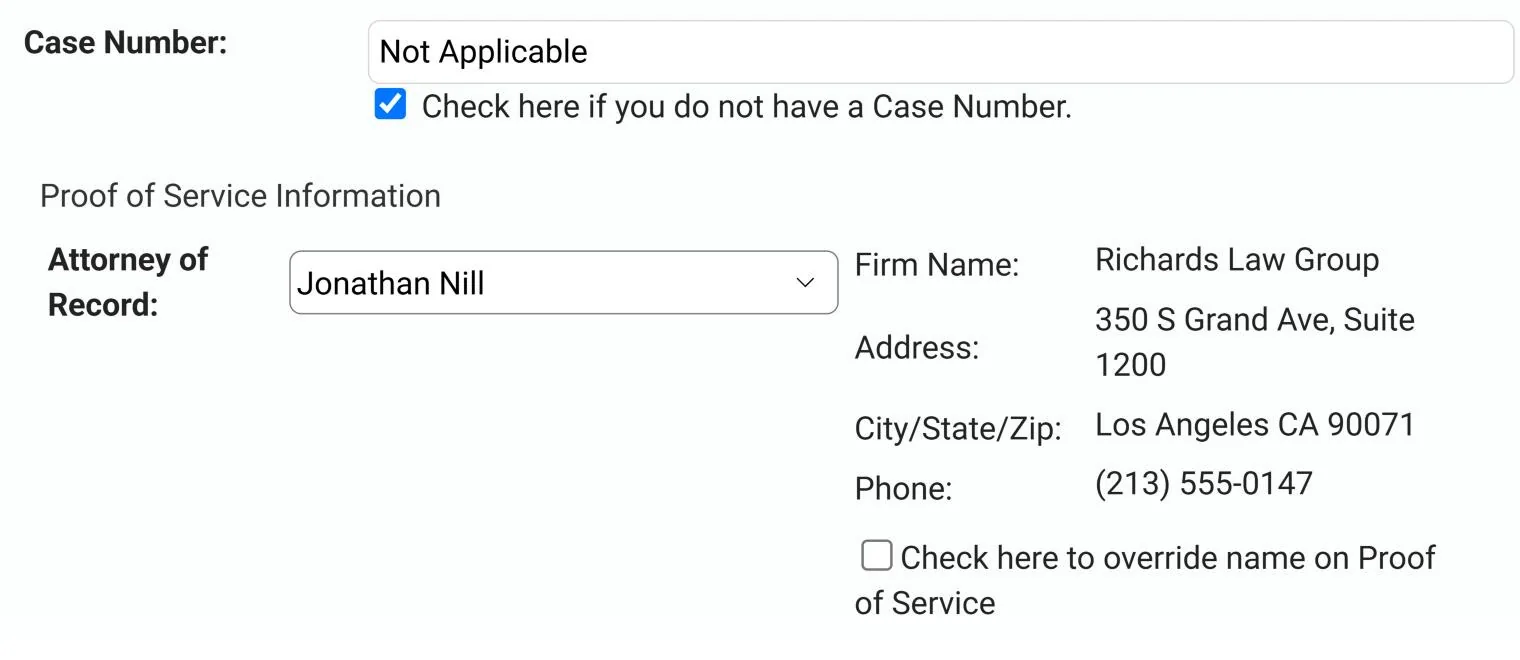
Check Check here if you do not have a Case Number. The case number shows Not Applicable. Then choose the Attorney of Record and click Next.
5B Change the name on the proof of service
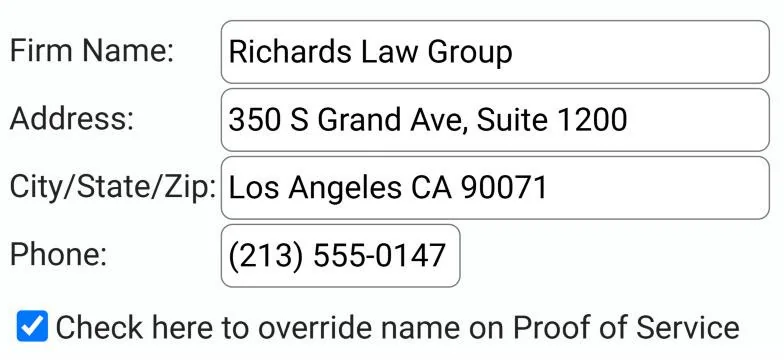
To show a different name in the header of the proof of service, check Check here to override name on Proof of Service. The firm name, address and phone fields open so you can change them.
6 Add the case participants
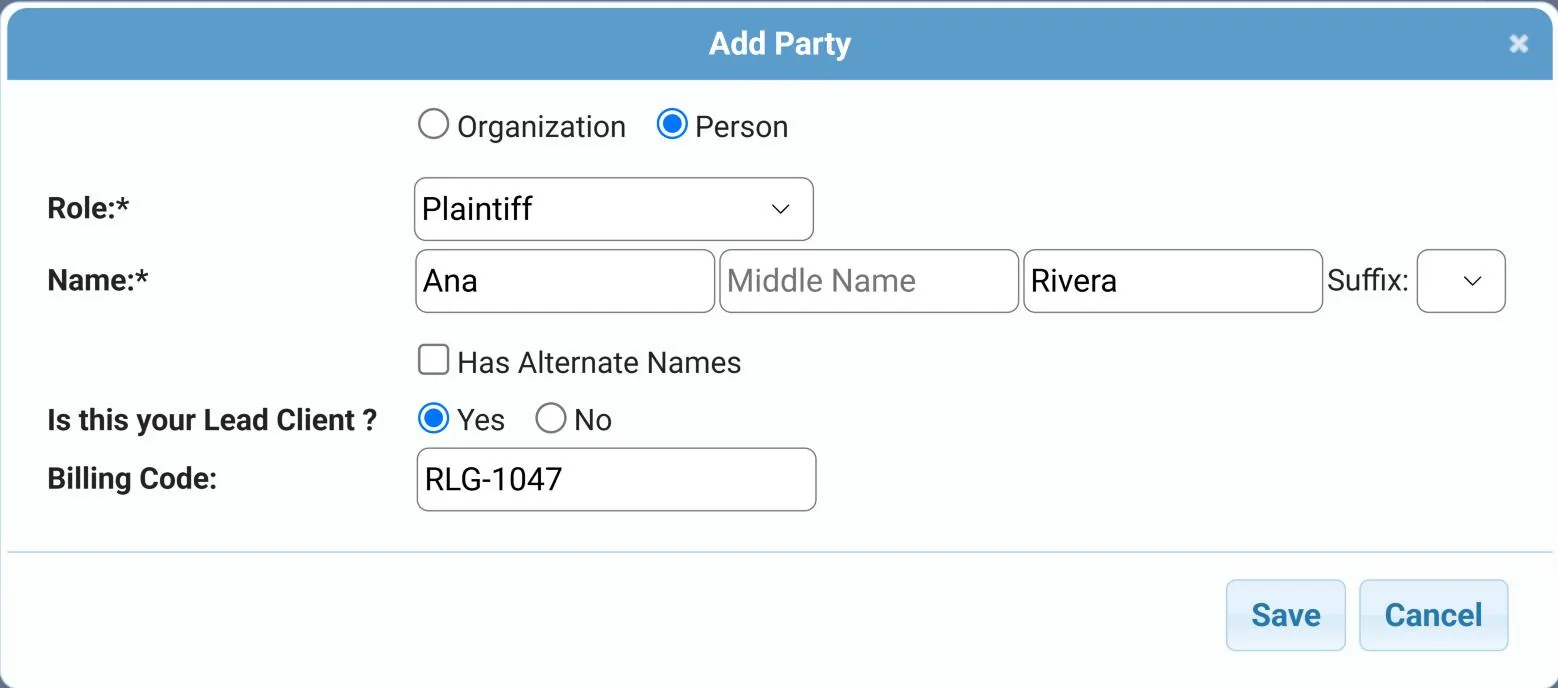
Add the lead parties in the case, such as the plaintiff and the defendant. You only need the lead parties. Parties already on the case are listed for you. Click Add Party(s) to add one.
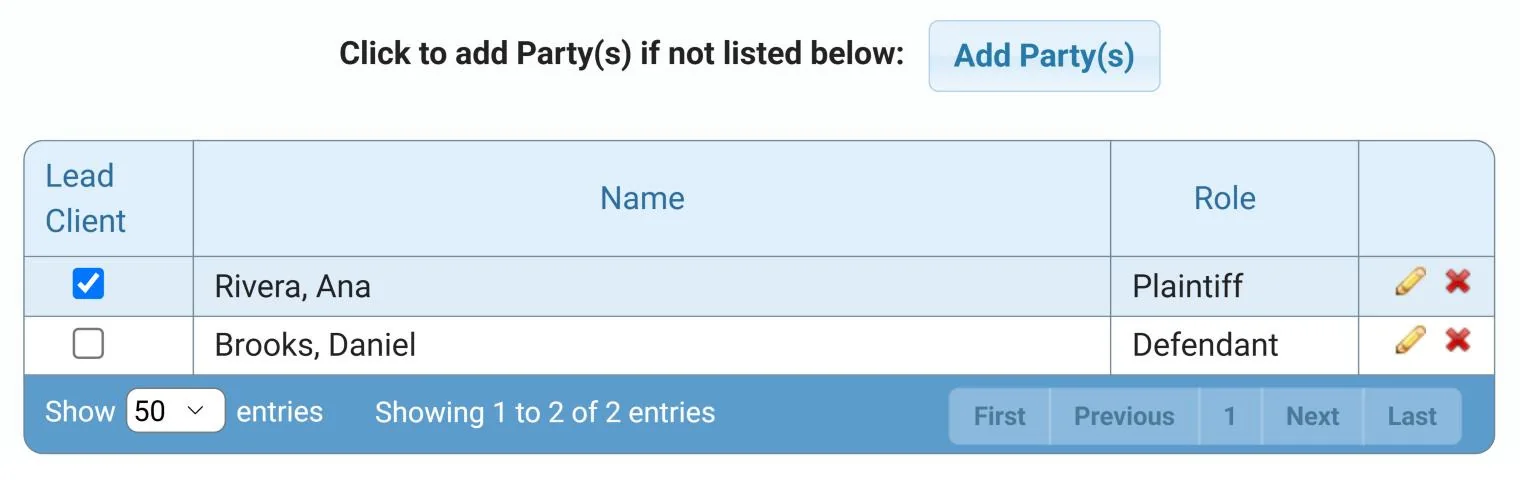
In the Add Party box, choose Organization or Person, choose the Role, such as Plaintiff, and enter the name. Under Is this your Lead Client?, choose Yes for your client. Click Save.
Click Next.
7 Upload your documents
On the Documents tab, choose Upload to send files from your computer, Fax to fax them to us, or Existing Documents to use documents already uploaded on this case.
To upload, start typing the Document Title and choose it from the list, or type your own title. Choose Starts with or Contains to change how the list is searched.
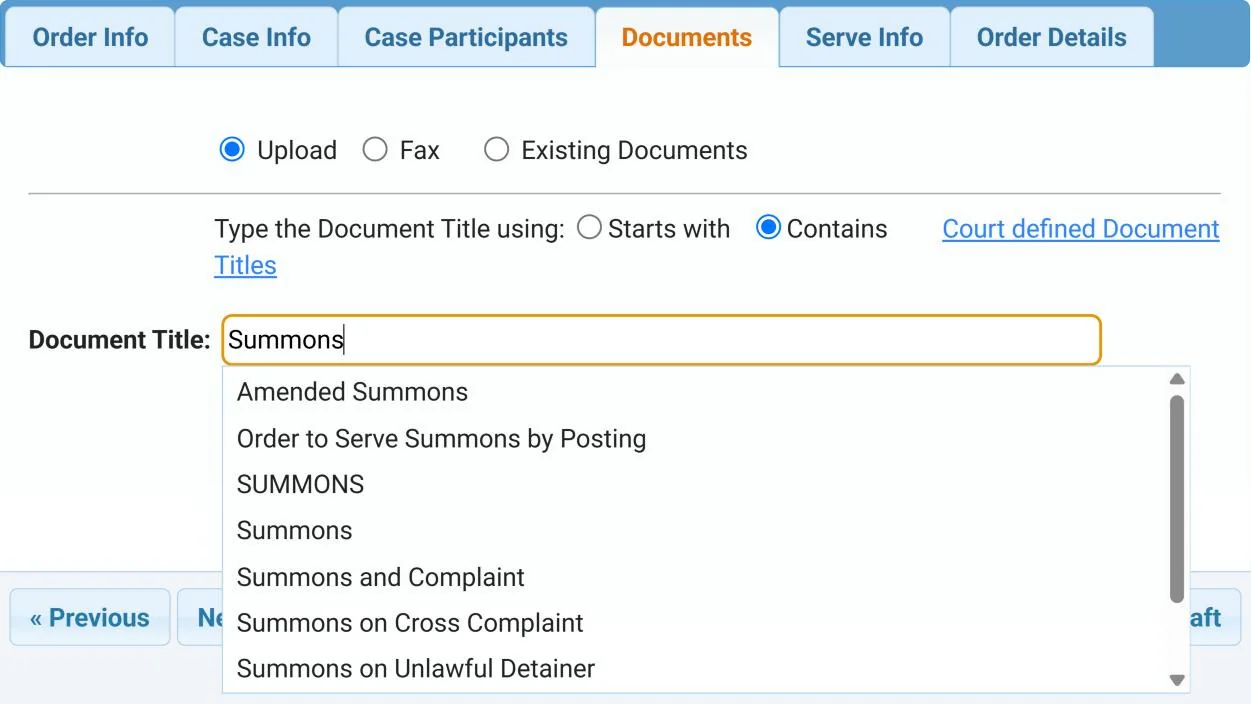
Then click Upload from Computer and choose the file. Each document you attach is listed under Title.
7A Or upload from Clio or NetDocuments
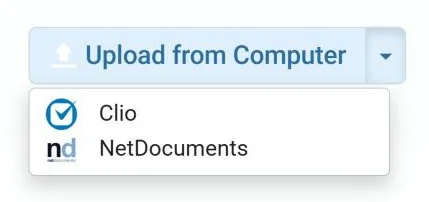
If your firm keeps its files in Clio or NetDocuments, you can attach the document from there instead of from your computer. Click the arrow next to Upload from Computer and choose Clio or NetDocuments. Sign in if asked, then pick the file.
For the full steps, see Using Clio with Direct Legal Support or Using NetDocuments with Direct Legal Support.
7B Use documents you already uploaded
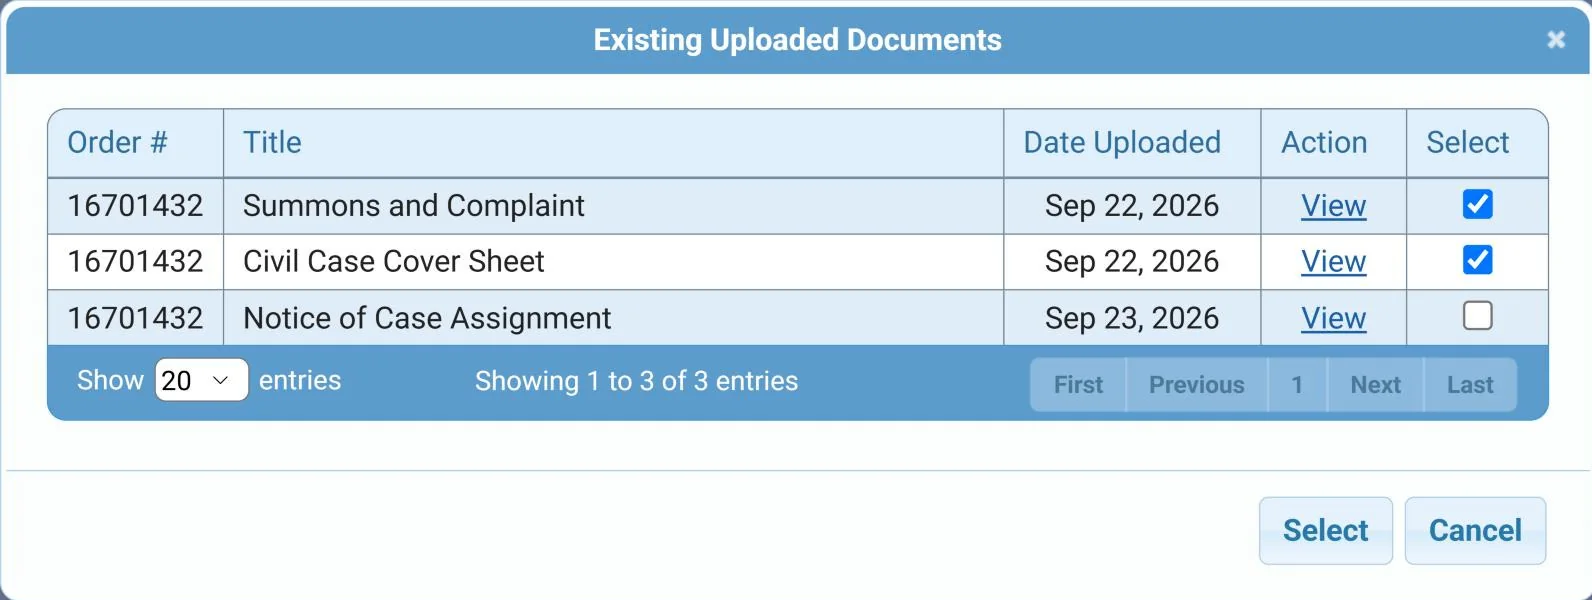
Choose Existing Documents to see the documents already uploaded on this case. Click View to open one. Check the box under Select next to each document you want to use for this order, then click Select.
7C Fax your documents instead
Choose Fax. Type the title of each document you will fax and choose it from the list, or type your own and click Accept. Each title is listed under Title. Then choose the total number of pages for all documents. This is an estimate. We count the pages when the fax arrives. Step 10 explains the fax cover page.
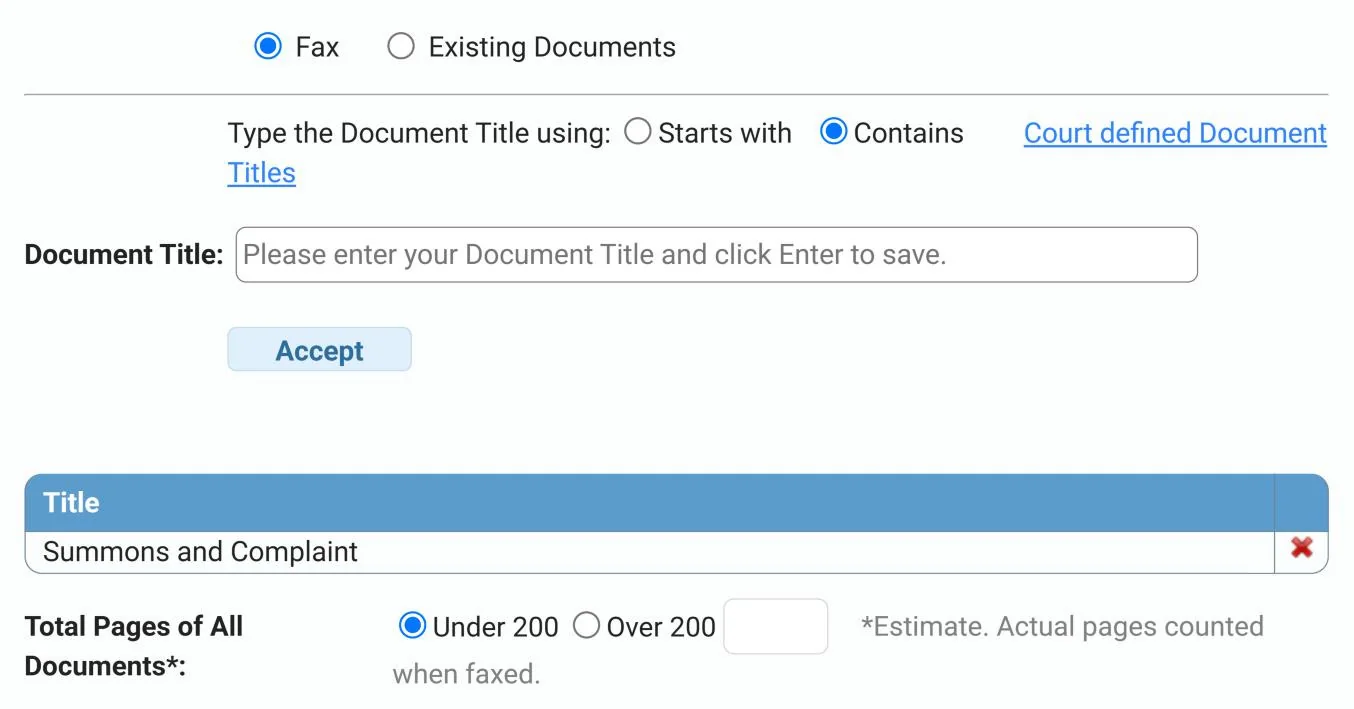
When all of your documents are listed, click Next.
8 Check the service address
The Serve Info tab shows the party, the address you entered and your service options. Make sure the address where we will attempt service is correct, then click Next.
9 Choose when to attempt service
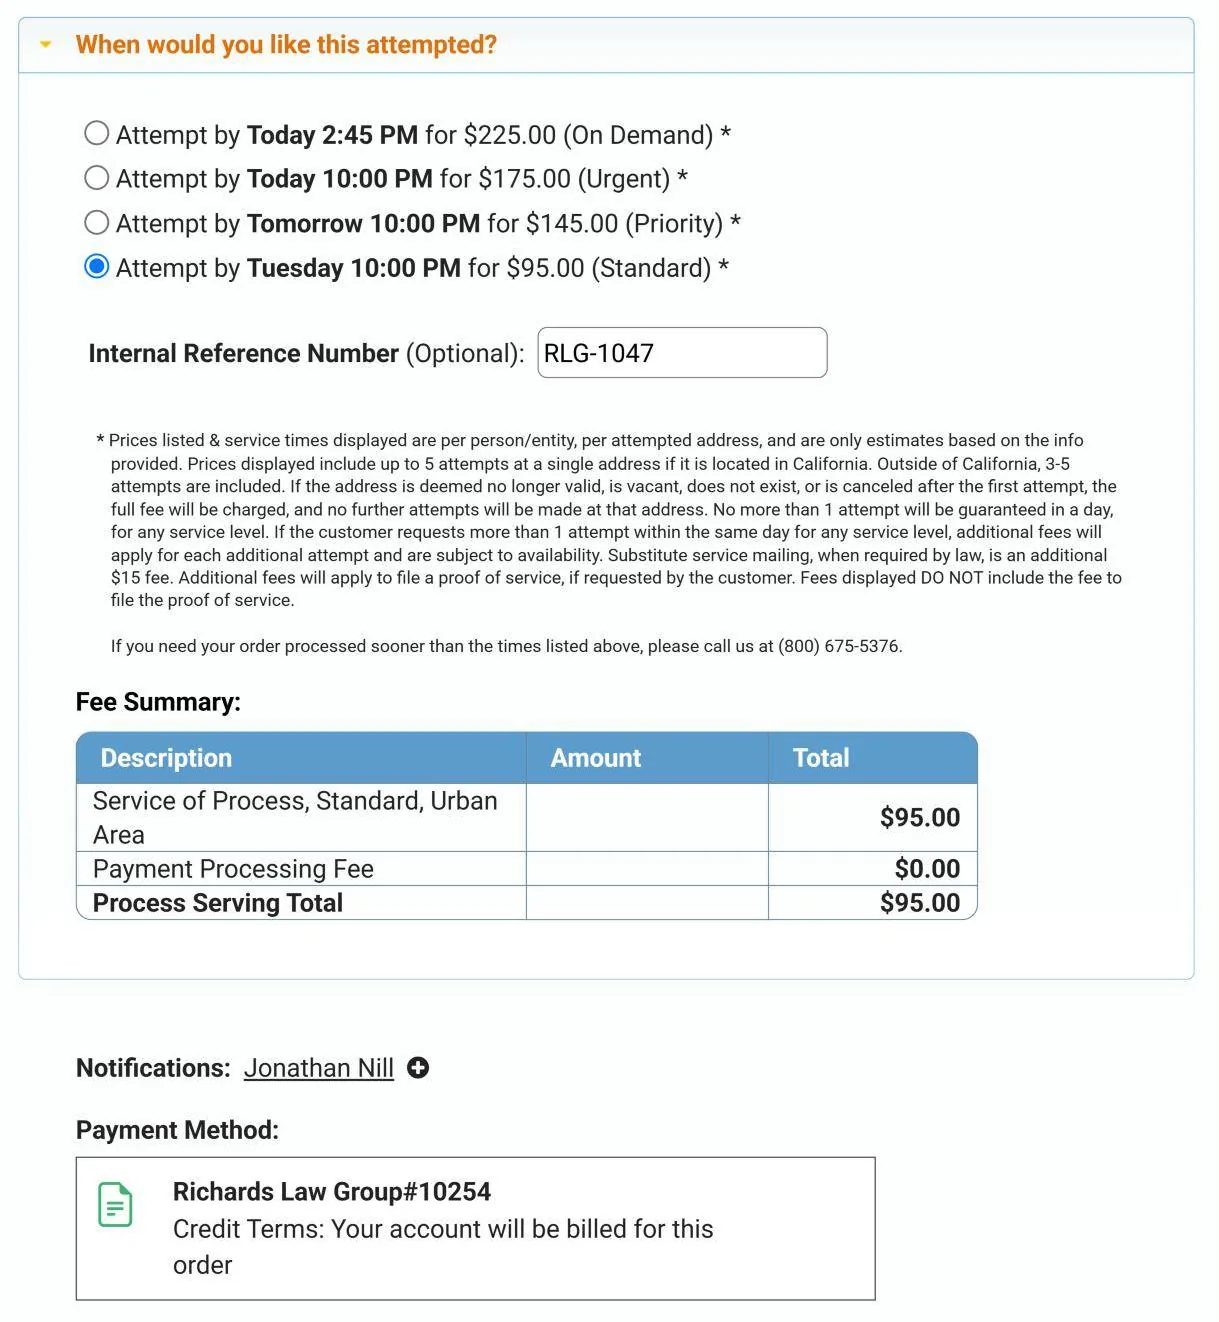
On the Order Details tab, choose a service level under When would you like this attempted? The price of each level is shown next to it. If your firm tracks orders by its own number, enter it in Internal Reference Number. It is optional.
The Fee Summary shows the service fee, any Payment Processing Fee and the order total. Check Notifications for the people who will get status updates (click + to add someone) and the Payment Method. When you are ready, click Submit.
10 Get your confirmation
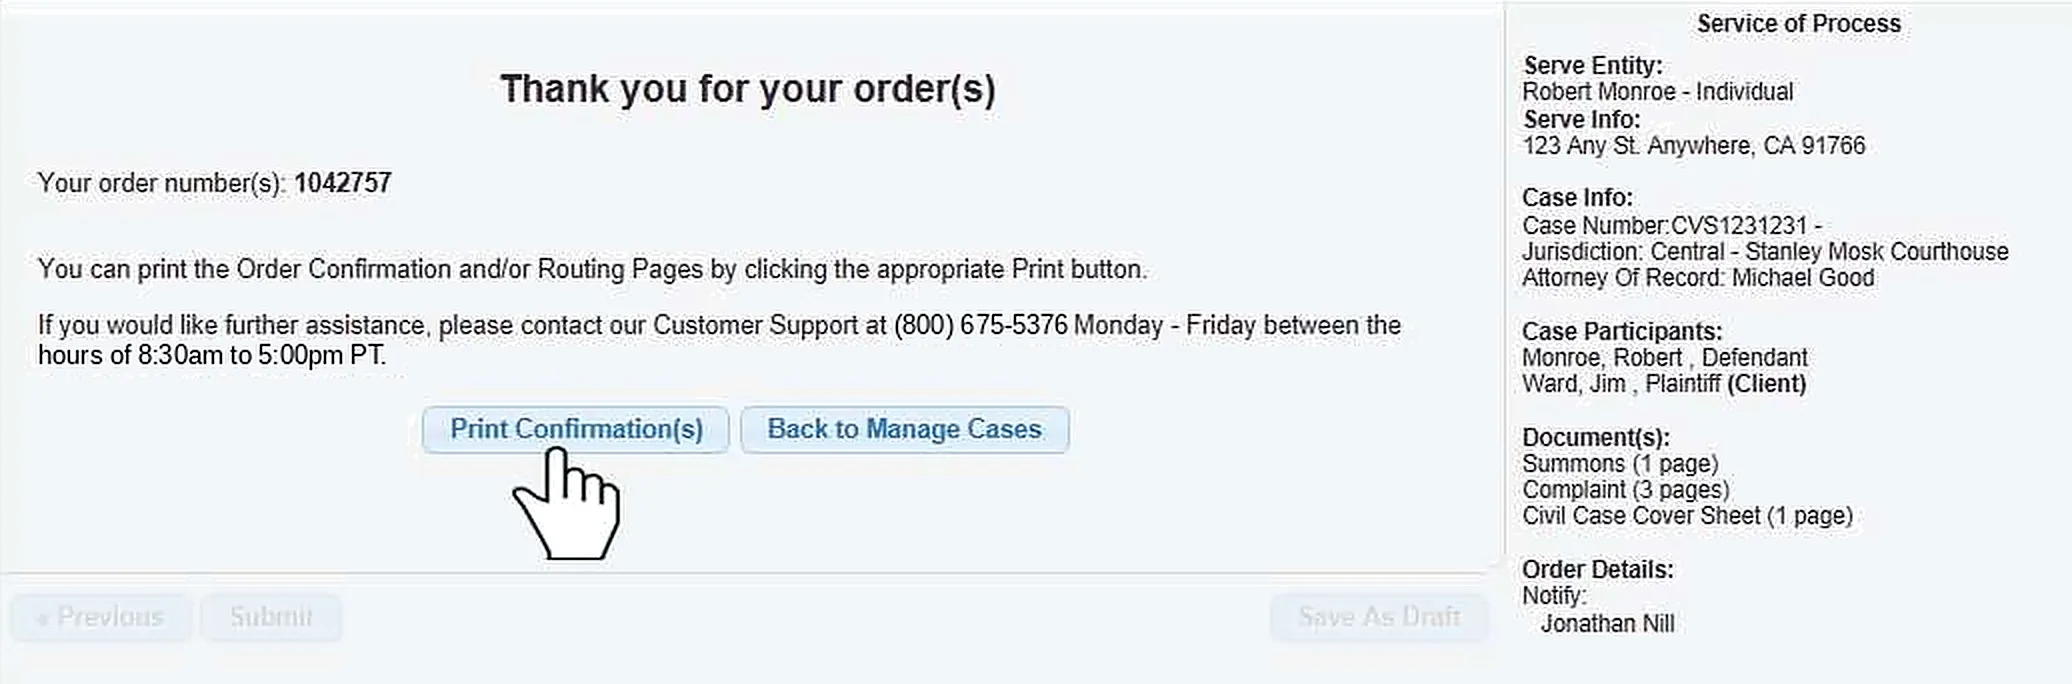
A confirmation appears with your order number. Click Print Confirmation(s) to print the order confirmation or routing pages.
After you order
- Follow your order under Pending Orders on your dashboard
- Find the proof of service under Closed Orders once service is complete
Good to know
Serving more than one party? See our guide How to Place a Process Serving Order for Multiple Entities.
Need it sooner than the times shown? Call us at (800) 675-5376.
Questions? We’re here to help.
Call our Litigation Division Monday to Friday, 8:30 a.m. to 5:00 p.m. Pacific, or email info@directlegal.com. Ready to order? Log in to the portal.
Prefer paper? Download this guide as a PDF to print or save. More guides: Client Portal Guides.