
Start here
Log in to the portal →Or go to directlegal.legalconnect.com and log in with your email address and password. Use a current version of Chrome, Edge, Firefox or Safari. New to the portal? See our Creating a New Account guide.
What you will need
- Your documents as PDF files, one file per document
- The county and court where you are filing
- The case category, case type and amount in dispute
- The names of the parties and attorneys (a self-represented party also needs an address, phone number and email)
- Your billing code or client matter number, if your firm uses one
- To have the documents served: who to serve and where
1 Click Place an Order
Log in to your account. On your dashboard, click Place an Order.

2 Choose eFiling
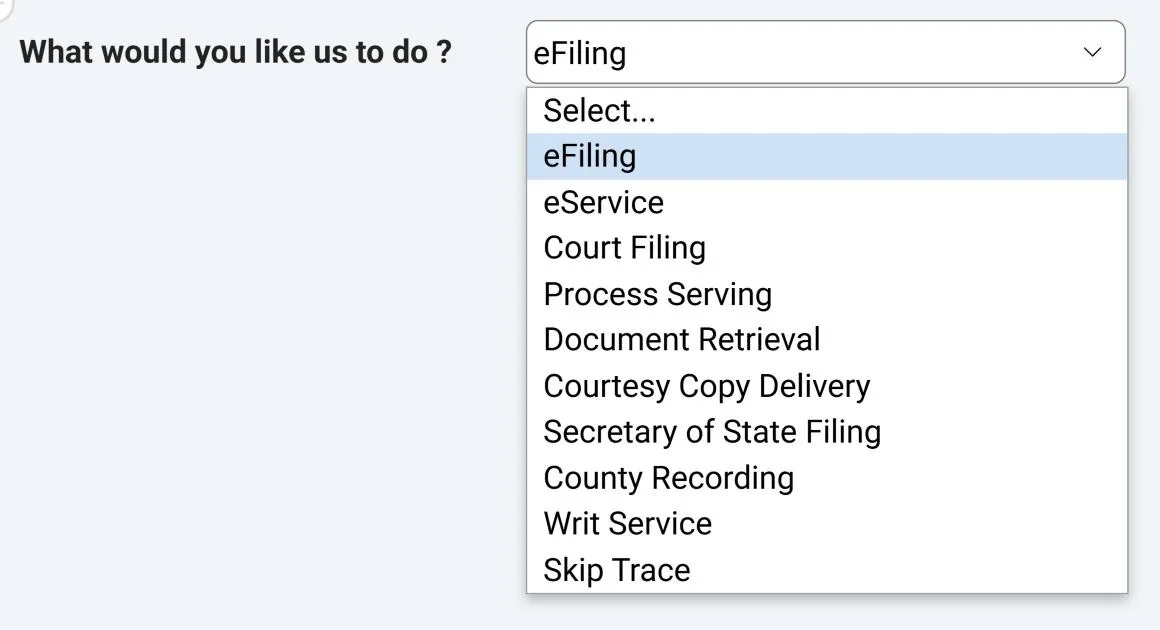
In What would you like us to do?, select eFiling.
3 Select the county and Case Initiation
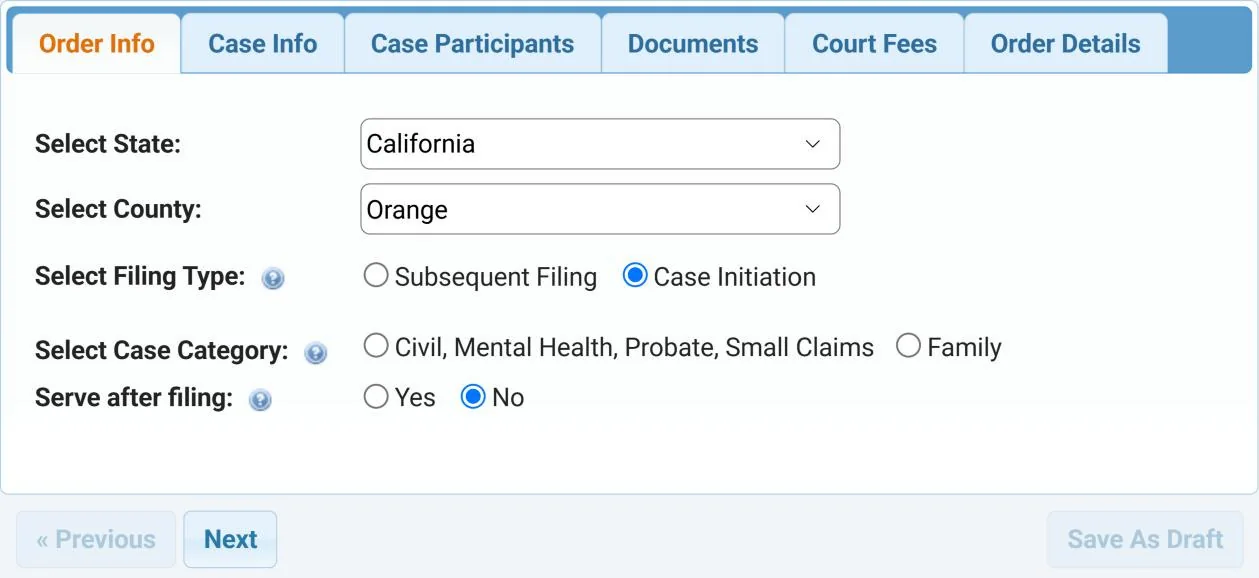
If the form shows Select State, choose California. In Select County, choose the county where the case will be filed. Under Select Filing Type, choose Case Initiation.
Some counties, such as Orange, also show Select Case Category. Choose Civil, Mental Health, Probate, Small Claims or Family.
Under Serve after filing, choose Yes if you want us to serve the documents once they are filed. Click Next.
4 Enter the case information
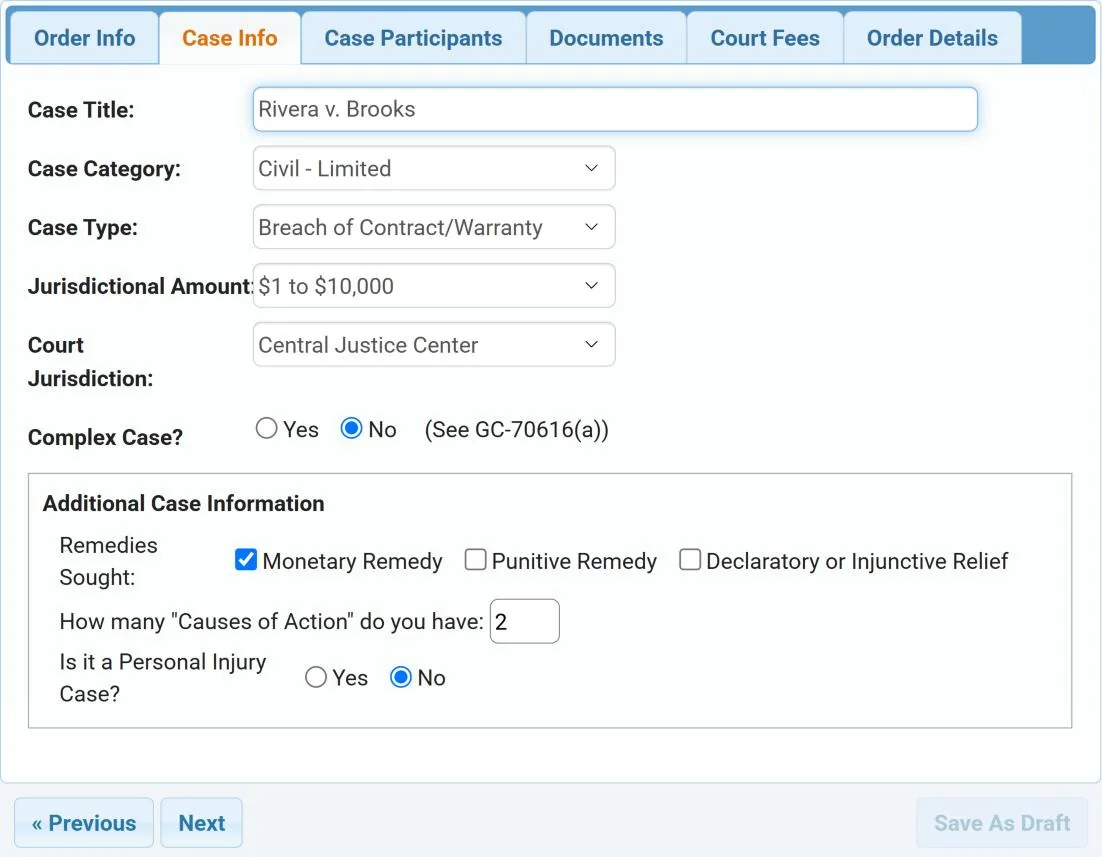
On the Case Info tab, enter a Case Title. Choose the Case Category, Case Type, Jurisdictional Amount and Court Jurisdiction, and answer Complex Case? (1)
Under Additional Case Information, check the Remedies Sought, enter how many Causes of Action you have, and say whether this is a personal injury case (2). Click Next.
4A For an unlawful detainer: add the premises
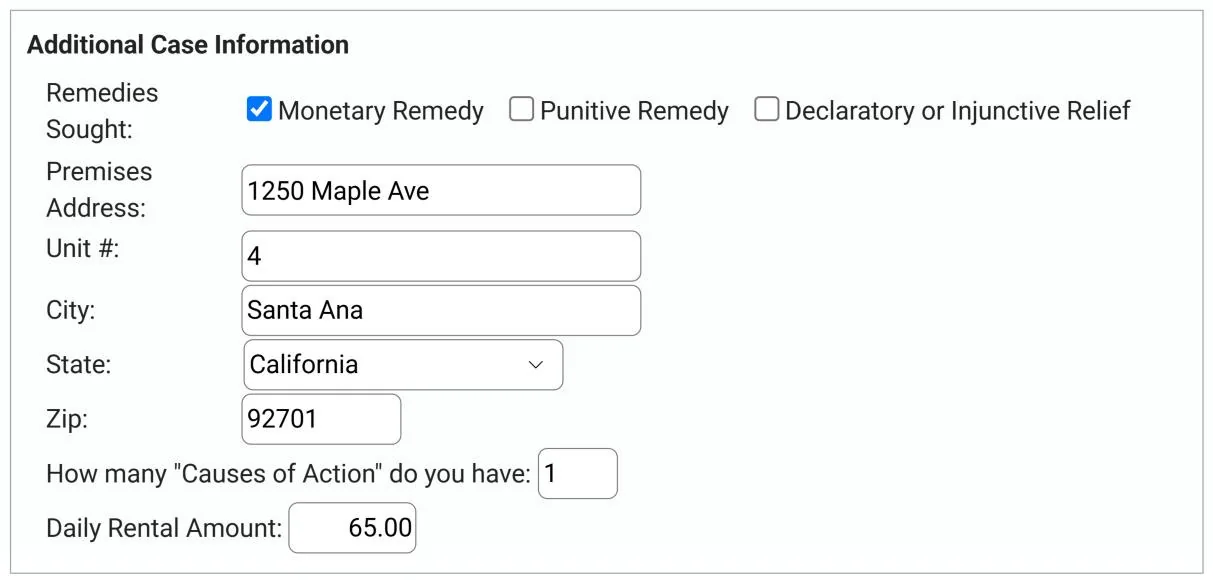
If the case is an unlawful detainer, Additional Case Information also asks for the Premises Address, one line at a time from the street address down to the ZIP code, and the Daily Rental Amount.
5 Add the case participants
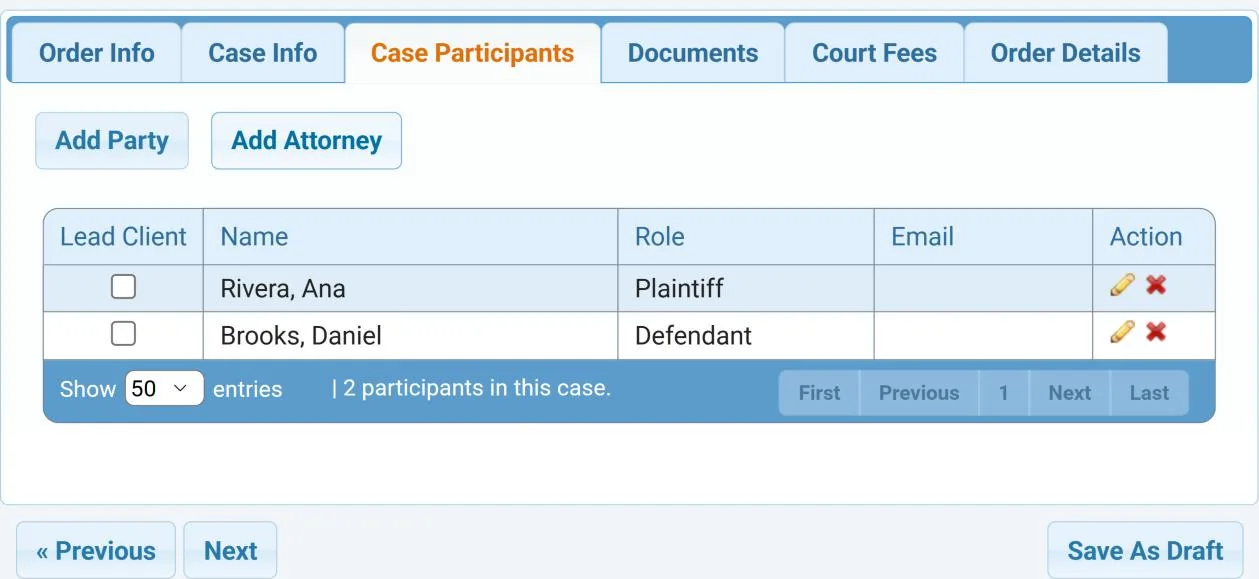
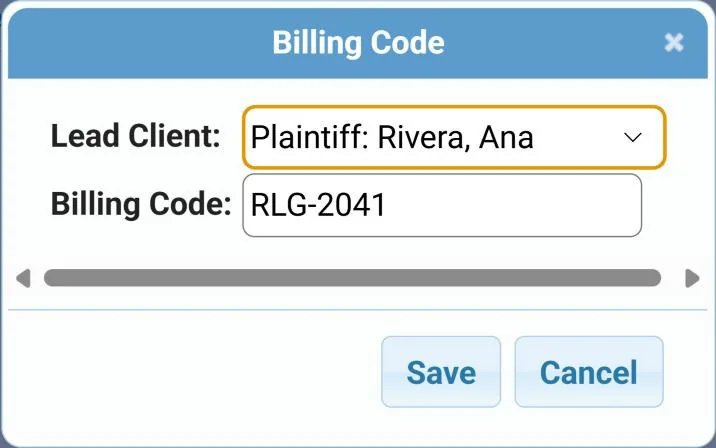
On the Case Participants tab, click Add Party or Add Attorney and enter each one’s information. Check Lead Client next to your client. Click Next when everyone is listed.
6 Choose the document type
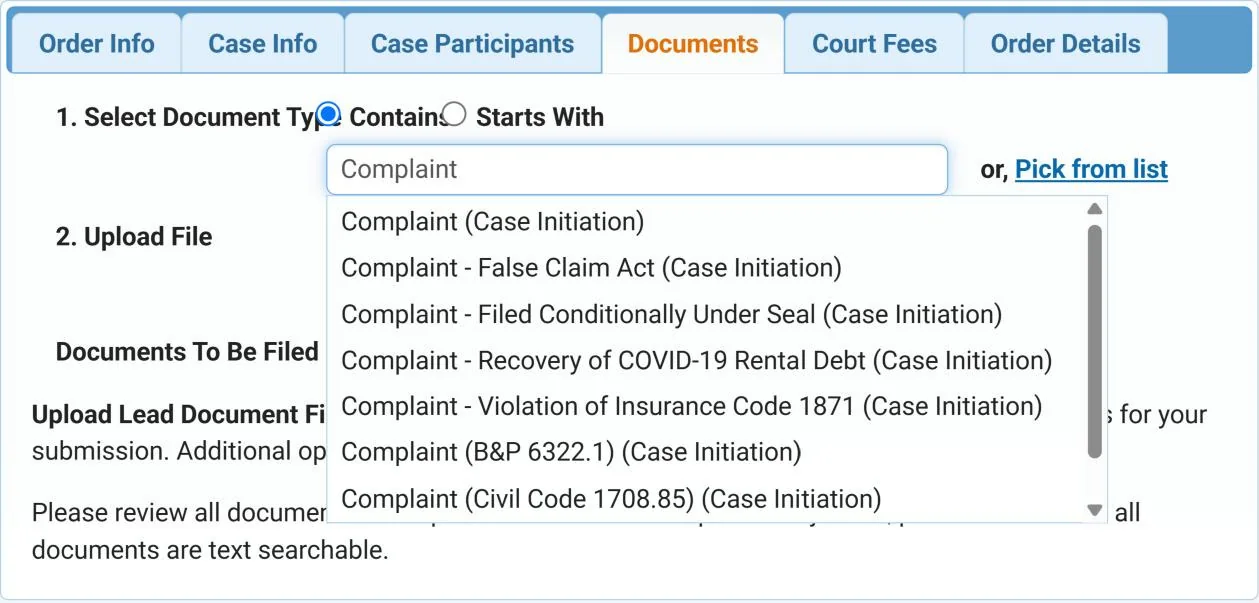
On the Documents tab, start typing in Select Document Type and choose your document from the list. Choose Contains or Starts With to change how the list is searched, or click Pick from list to browse.
7 Enter the title and upload the file
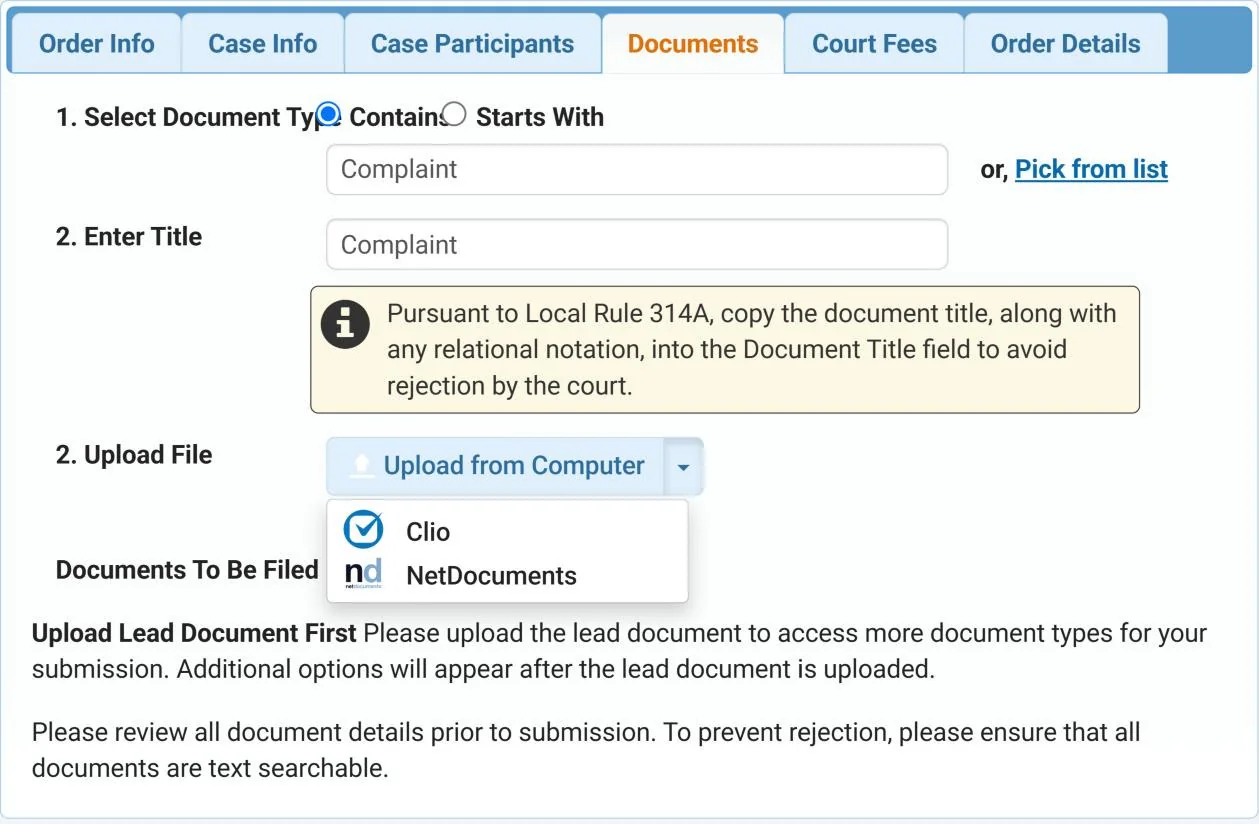
Check the Title. Some courts, such as Orange County, ask you to copy the document’s exact title into this field (1). Then click Upload from Computer and double-click the file to upload it (2).
7A Or upload from Clio or NetDocuments
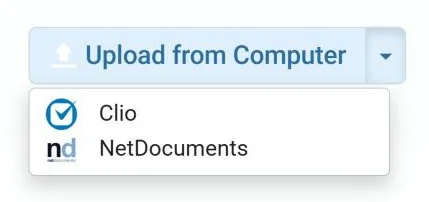
If your firm keeps its files in Clio or NetDocuments, you can attach the document from there instead of from your computer. Click the arrow next to Upload from Computer and choose Clio or NetDocuments. Sign in if asked, then pick the file.
For the full steps, see Using Clio with Direct Legal Support or Using NetDocuments with Direct Legal Support.
8 Fill in the document details
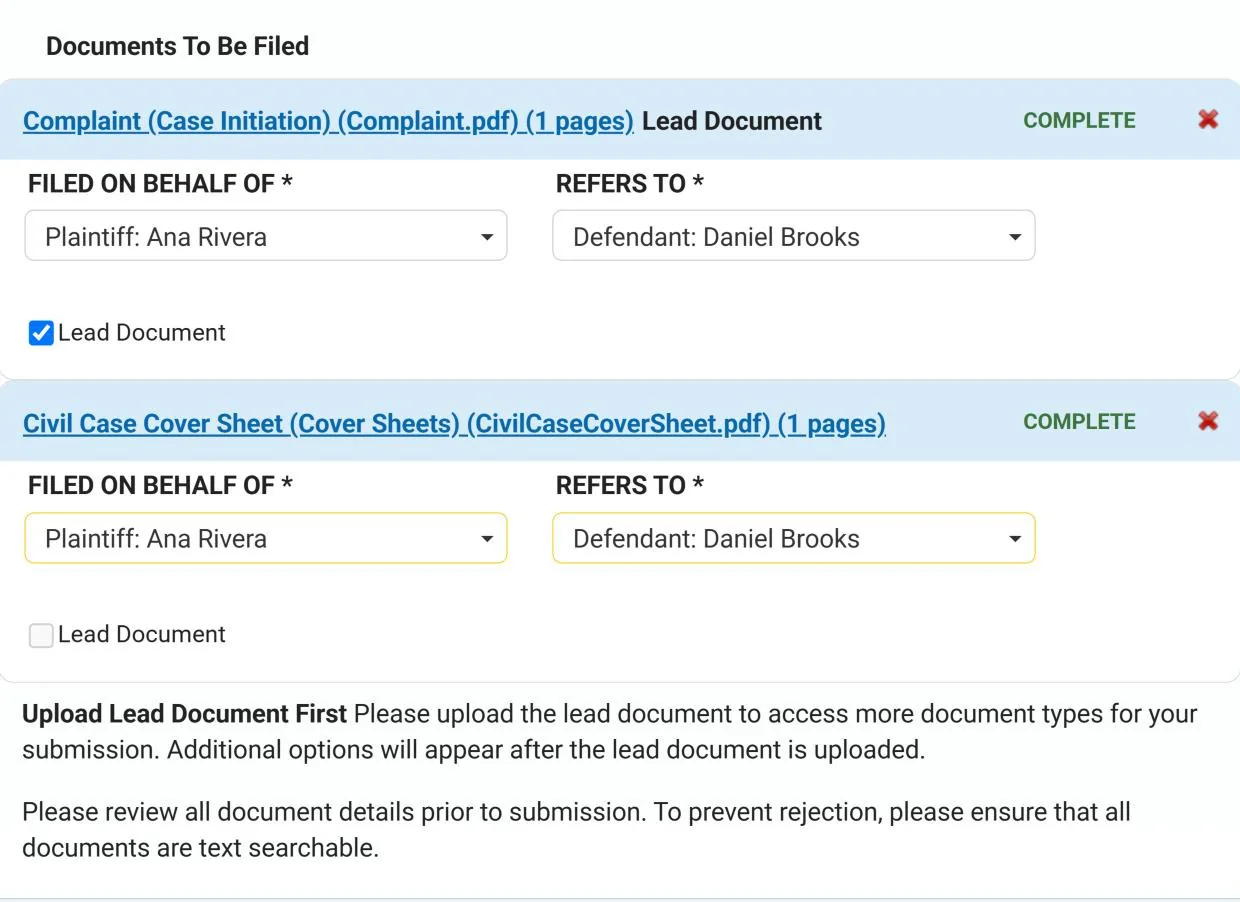
Your files are listed under Documents To Be Filed. For each document, fill in the fields marked with an asterisk, such as FILED ON BEHALF OF and REFERS TO, to show who is filing it and who it is about.
Check Lead Document on the main document in the filing, such as the complaint. Click Next.
9 Review the court fees
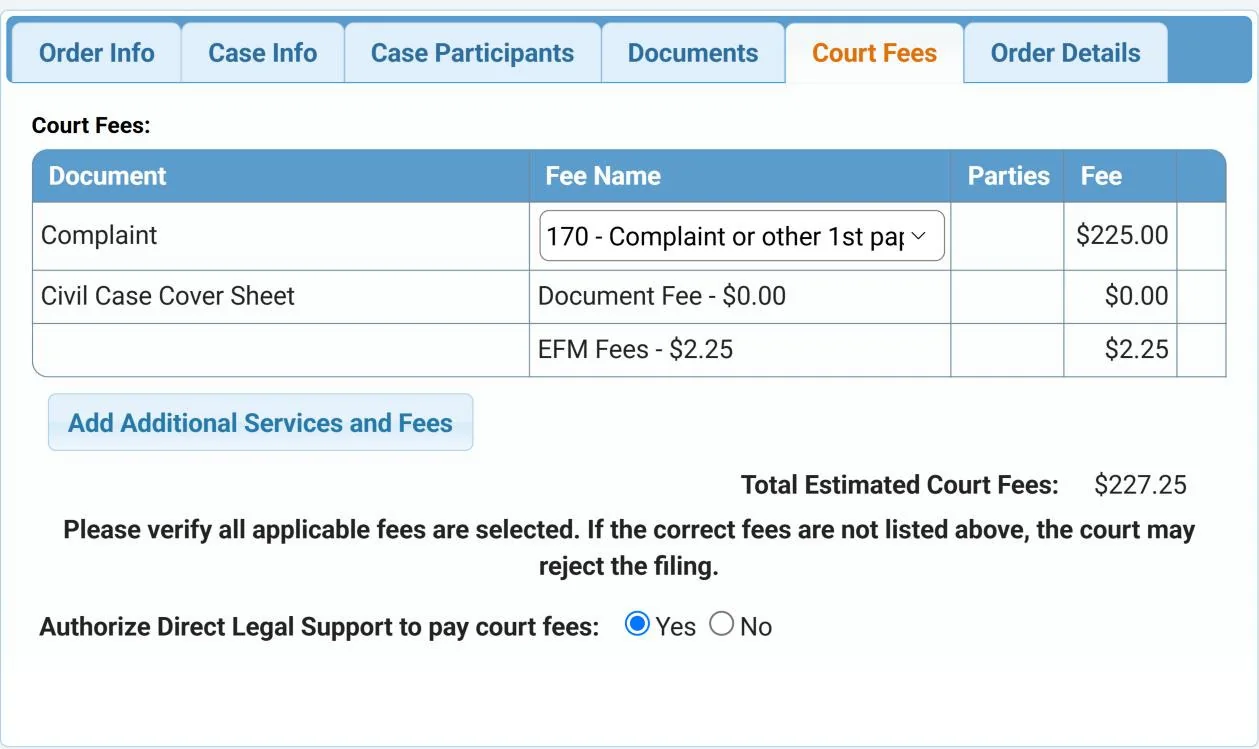
The Court Fees tab lists the fee for each document and the EFM Fees charged by the electronic filing manager, with the Total Estimated Court Fees. Make sure the right fee is chosen under Fee Name for each document (1), because the court may reject the filing if the correct fees are not selected. If a fee you need is not listed, click Add Additional Services and Fees (2).
Under Authorize Direct Legal Support to pay court fees, choose Yes or No (3). Click Next.
9A If you are serving: add the service address
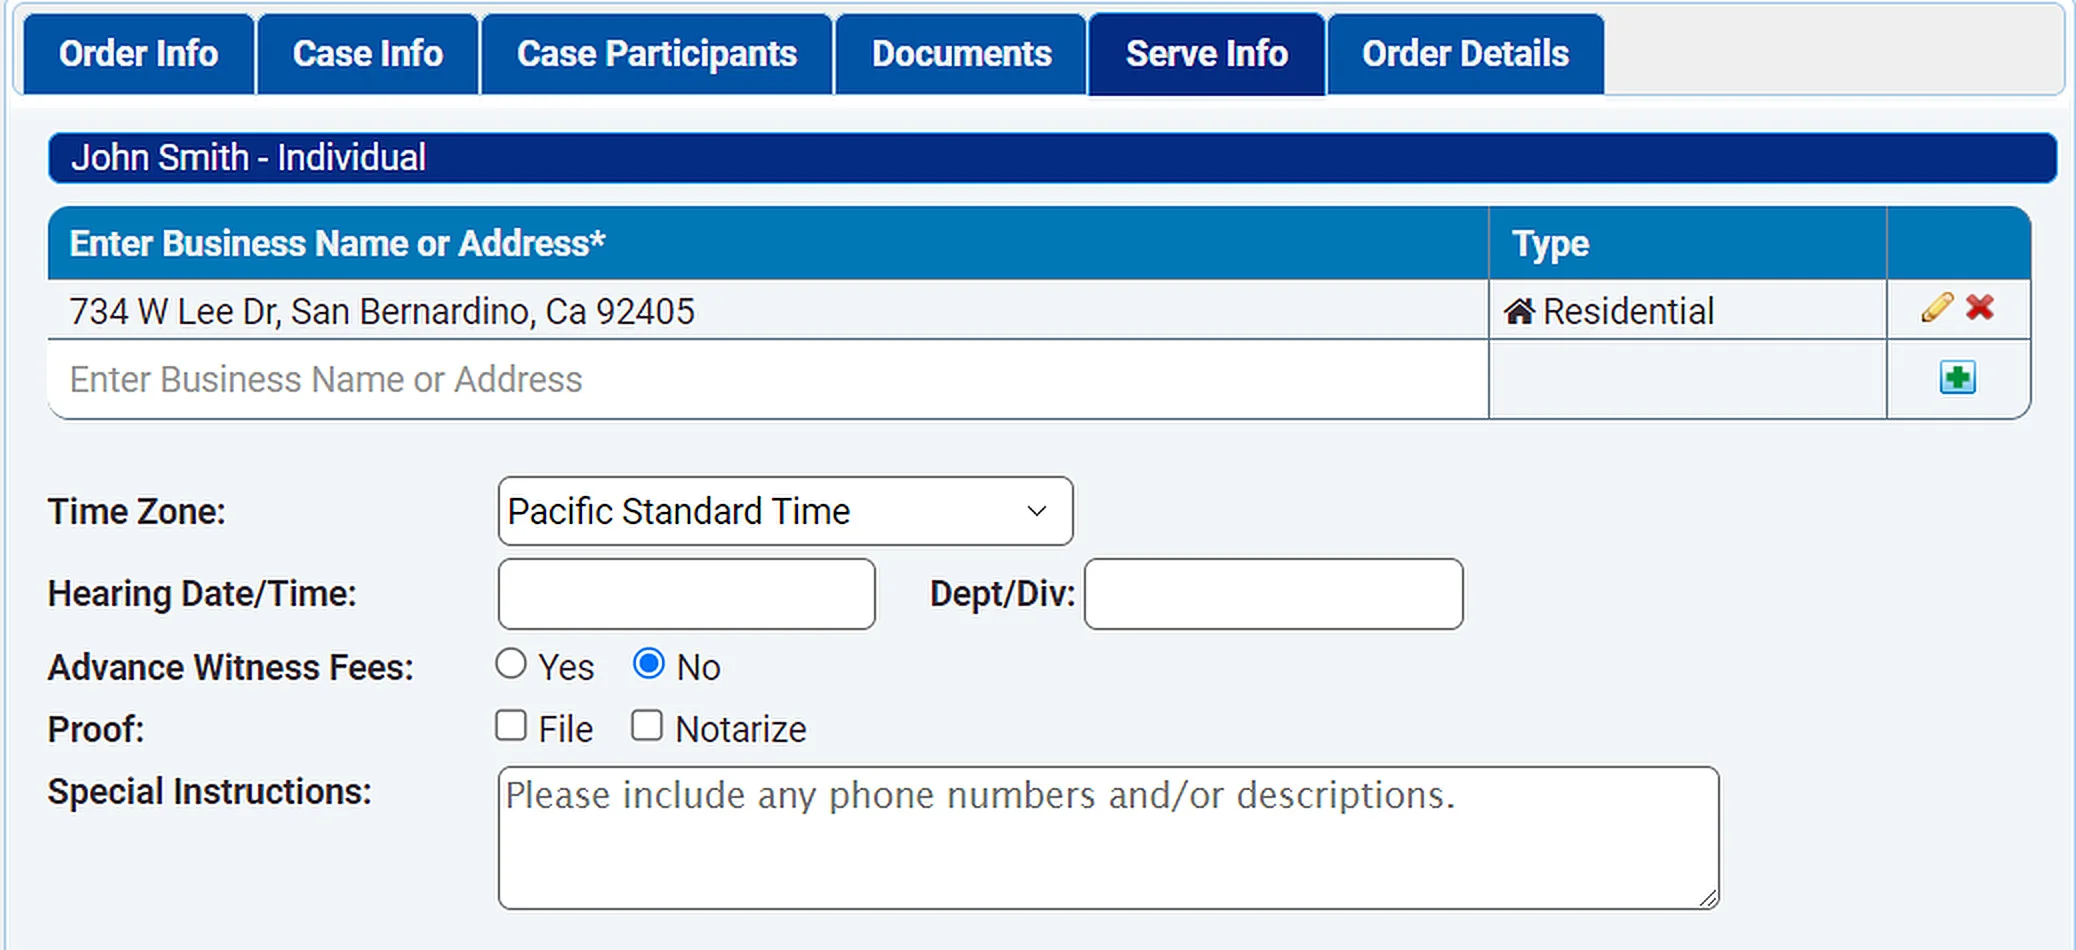
If you chose to serve the documents after filing, the Serve Info tab opens. Click a party’s name to open the address fields.
In Enter Business Name or Address, enter the address where you would like us to serve the documents, then click the green + button to add it. Fill in any other details that apply, such as Special Instructions. Repeat for each party you need served, then click Next.
10 Choose your service level
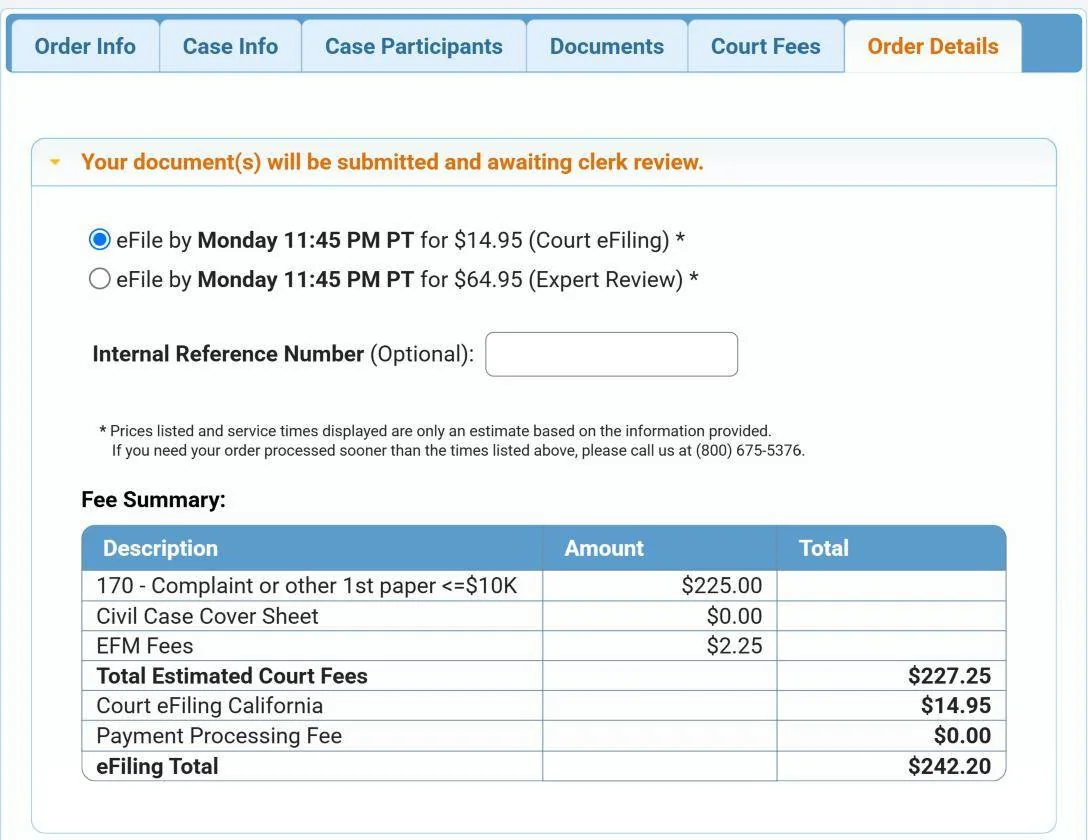
On the Order Details tab, a notice says your documents will be submitted and awaiting clerk review (1). Choose a service level for the eFiling (2). If your firm tracks orders with its own number, enter it in Internal Reference Number (3).
If you are also having the documents served, open When would you like this attempted? and choose when we should attempt service.
The Fee Summary lists the court fees, the EFM fees, our eFiling fee and the total for your order (4). The prices and times shown are estimates based on the information you entered.
11 Add a message and submit
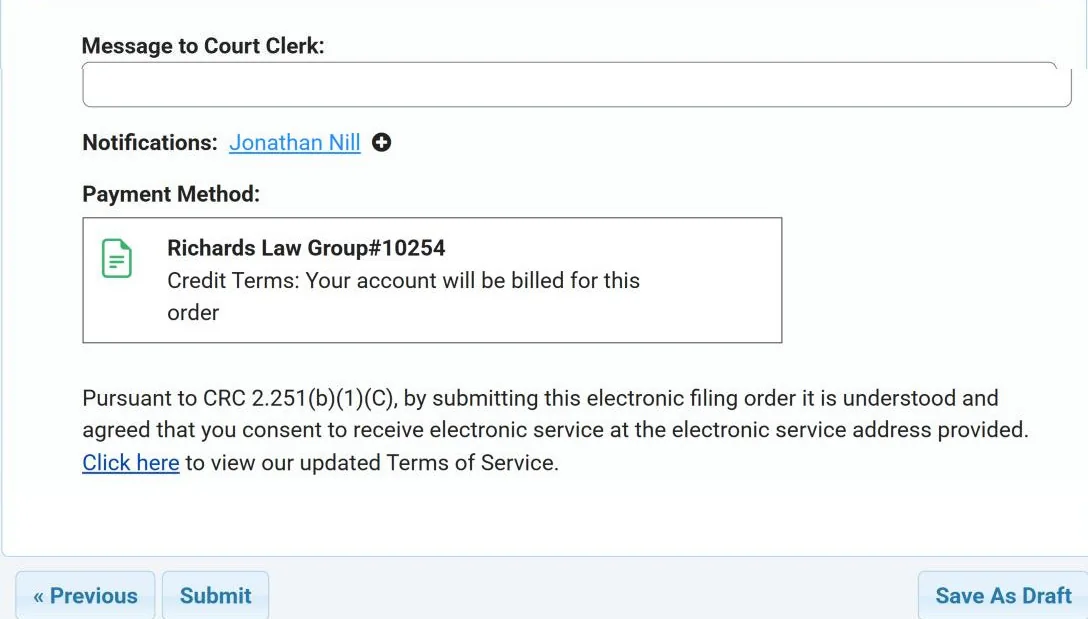
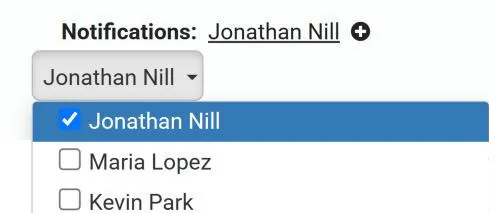
Type any Message to Court Clerk (1). Notifications shows who gets status updates about this order (2). Under Payment Method, check how the order will be paid (3).
By submitting an eFiling order, you consent to receive electronic service at the electronic service address you provided (4). When you are ready, click Submit (5).
12 Get your confirmation
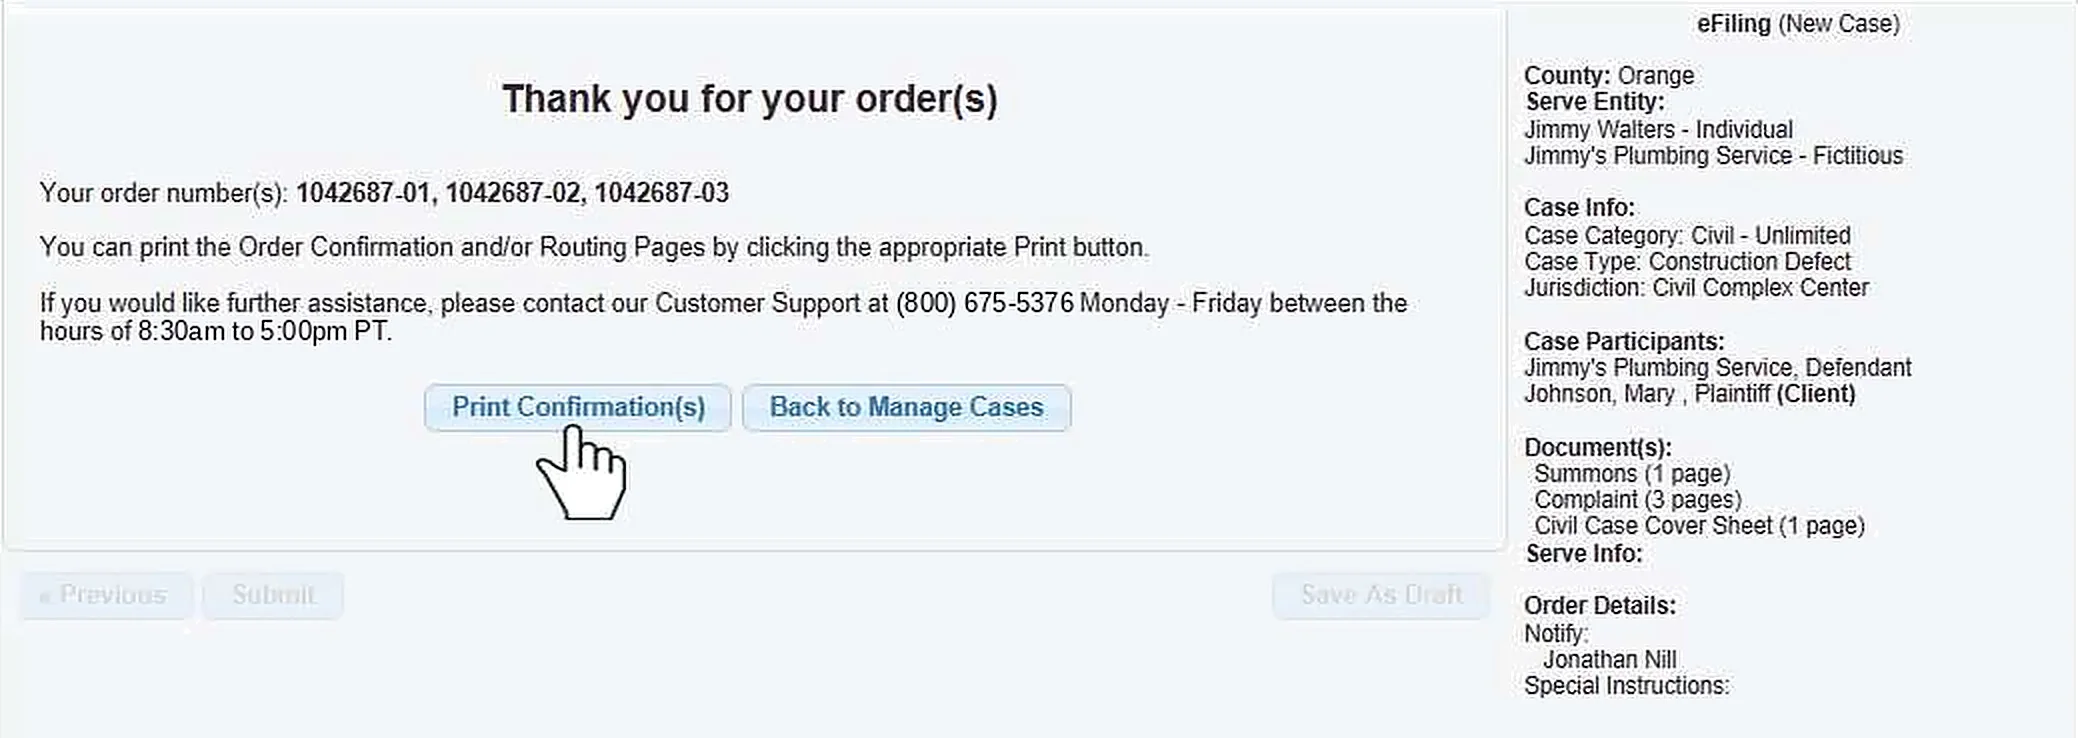
Your order number appears to confirm that the order was placed. Click Print Confirmation(s) to keep a record of your order.
After you order
- Follow your eFiling under Pending Orders on your dashboard
- Find conformed copies under Closed Orders once the filing is complete
Good to know
Filing in a case that is already open? Choose Subsequent Filing in step 3. See our guide to eFiling for subsequent cases.
Filing in Texas, Illinois, Indiana or Maryland? See that state’s eFiling guide.
Need it sooner than the times shown? Call us at (800) 675-5376 before you place the order.
Questions? We’re here to help.
Call our Litigation Division Monday to Friday, 8:30 a.m. to 5:00 p.m. Pacific, or email info@directlegal.com. Ready to order? Log in to the portal.
Prefer paper? Download this guide as a PDF to print or save. More guides: Client Portal Guides.